We are building a country house with an attic with our own hands. How to build an attic roof with your own hands and not make mistakes
Construction of an attic is very important process, which is carried out both at the design stage of the entire house and after its construction. This room provides its owners with additional square meters of living space. Let's look at the features of the attic construction below.
Construction of an attic: project and its development
The attic is a rather difficult part of the building to construct. It is preferable to design it at the stage of building the house itself. Because the construction of a residential attic is already underway finished building not always possible. First of all, due to the fact that the attic space has considerable weight, and therefore loads the foundation.

The construction of an attic consists of a certain kind of stages, such as:
- attic construction drawings;
- dismantling old roofing materials, in the event that the attic is erected on an already finished building;
- strengthening the walls on the top floor, strengthening the foundation, if necessary;
- walling attic room;
- construction of the roof, its insulation, waterproofing and finishing;
- installation window designs;
- interior finishing works.
Compliance with all technological nuances in the construction of an attic will allow you to obtain a reliable and durable building.
The first and most important stage- drawing up a project for an attic room. At this stage, you should take into account such features as the size of the room, the material used in its construction, the roof and the level of its slope and many other nuances.

There are three ways to design an attic. The first is the most budgetary, drawing up the project manually. However, this operation requires minimal design experience. The second way is to use ready-made design documentation; however, it is not a fact that someone’s attic design will be completely suitable for your home, so you will still have to make some adjustments to it. The third way is to contact specialized organizations that, in the shortest possible time, will help you draw up an attic project that is ideal for your home.
In the process of independent design, you should take into account the wall loads on the building, its appearance And Decoration Materials, used both indoors and outdoors. In addition, it is imperative to take into account the load from the building on the foundation; it may need to be strengthened. If the attic is too heavy, there is a risk of deformation or cracks in the house.
Experts will help you choose the optimal building materials, which, on the one hand, will ensure the attic's durability in operation, and on the other hand, will help reduce its load on the base of the entire building.
In addition, after drawing up the project, it should be agreed upon with special government agencies. If you have a competent project, this process will go quite quickly.

Do-it-yourself attic construction in the house
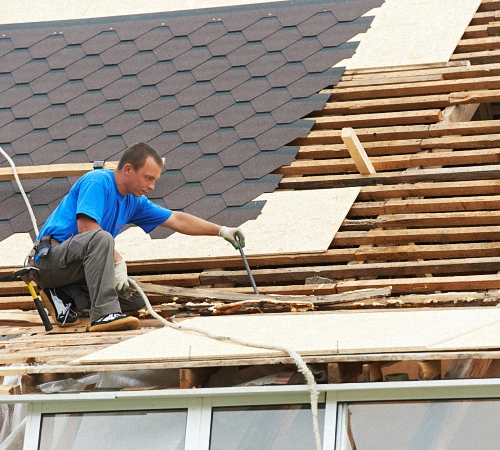
We invite you to familiarize yourself with the option of building an attic in an already built and commissioned residential building. In this case, the first step is to dismantle the old roof. Thus, it will be possible to expand the under-roof space and increase the safety of the building under construction.
To dismantle the roof, it is not necessary to hire specialists; all work can be done with your own hands. To do this, you must first get rid of the external roofing finishing material. Next, you need to completely remove the sheathing and rafter system.
After this, it is necessary to strengthen the walls on the adjacent floor, since the attic will exert a certain pressure on them. The design features of the attic exert pressure not only on the surface of the base of the building, but also on its walls. Therefore, first of all, before constructing an attic, it is necessary to strengthen the walls close to it. To do this, you should use special calculations, according to which this process is carried out and the strength level of old walls is determined.
The next stage is insulation and waterproofing of the attic floor, which is also the ceiling on the previous floor. By using given action will be able to ensure a healthy atmosphere in the room. To insulate the attic, you can use various thermal insulation materials in the form of polystyrene foam, mineral wool, etc.
Construction of the attic photo:
Next follows the process of erecting walls in the attic. The walls are made in accordance with the project developed in advance. Most often, wood or timber is used to build walls. To insulate the attic, it is recommended to use mineral wool or expanded polystyrene. Choosing material for external and interior decoration walls, try to give preference to materials with a high level of fire safety.
The next process is the construction of the roof. In this case, calculating the correct roof slope angle is very important. Since a roof that is too flat will negatively affect the ease of use of the attic space. Please note that the roof must be properly waterproofed, since if there is the slightest leak on its surface, moisture enters the attic.
In addition, the shape of the roof should be as simple as possible; the presence of broken and shaped elements will only complicate the process of their construction. Also important is the issue of insulating the attic space. For these purposes, various types are used Construction Materials. When choosing insulation for the attic, try to give preference to materials that do not absorb moisture and are resistant to frost, temperature changes and rodents. In addition, the thermal insulation material should not allow heat to escape from the room.

It is best to focus on carrying out internal thermal insulation work. To create it, follow a number of steps:
- install finishing in the form of plasterboard or plywood base;
- form a vapor barrier layer; special films are used for these purposes;
- lay thermal insulation material - the ideal solution is mineral wool;
- ensure proper waterproofing of the roof using a special type of membrane;
- lay external finishing roofing material.
To erect a roof, you will also need to install a rafter system and install sheathing, the installation step of which depends on the type of roofing material. After the roof installation is completed, windows should be installed.
In order to ensure high-quality lighting in the room, several windows should be installed in it, the size of which directly depends on the size of the attic itself. The window in the attic ceiling must be of high quality. It must be resistant to precipitation, wind, and temperature changes. In addition, with the help of window structures, high-quality ventilation of the attic is ensured.
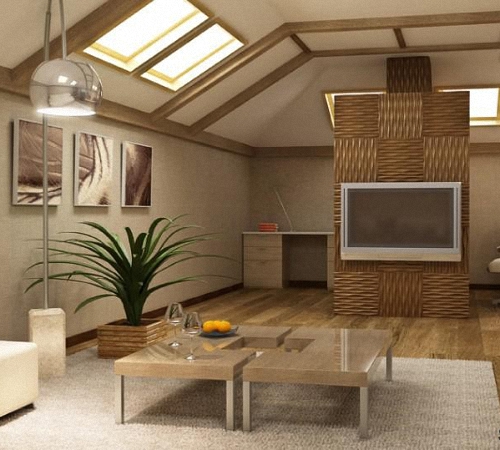
Further actions for the construction of the attic are related to the carrying out of interior finishing work, the organization of heating, the decoration and design of the room. Strict adherence to all recommendations for attic construction will help ensure long-term operation of this room.
Frame attic construction technology
Frame attic - perfect solution for any home, garage and even bathhouse. Among the advantages of frame-type attics, we note:
- lightness of the structure, so it does not load the main building, there is no need for additional strengthening of the walls and foundation;
- affordable cost of the attic - in comparison with its stone options;
- high level thermal insulation and sound insulation;
- the possibility of constructing an attic of almost any shape and configuration;
- ease of construction work, since the materials for the construction are quite light and special equipment is not required to lift them to the surface of the house.
The construction of a frame attic allows you to obtain a finished building with excellent heat and sound insulation properties. In addition, the roof will remain completely intact, and the usable area of the room will increase significantly.
A simpler process is to build an attic on a building that has not yet been erected. The construction of an attic on an already finished house requires the dismantling of the old roofing. Work should begin by studying the characteristics of the soil on the site and determining the bearing capacity of the foundation. If the foundation is not able to support the attic, then a series of works will be required to strengthen it.
Next, you should inspect the walls of the house for their susceptibility to additional loads. In this case, if necessary, it is necessary to strengthen the walls. After this, the old roof is dismantled and the ceiling is strengthened.
Construction wooden attic consists of the following stages:
- production of frame system;
- installation of walls;
- insulation of attic walls;
- installation work related to the installation of the roof;
- finishing the attic with roofing materials and insulating the roof;
- interior decoration of the attic.

In addition, the construction of an attic involves the installation of window and door structures, the manufacture and installation of stairs, etc.
In order to construct an attic from timber, you should prepare an edged board, plywood, screws and the timber itself. Frame structure The height should be comfortable for the average person to move around. The optimal height of the attic is at least two meters. The height of the ridge zone should be about 350 cm.
The easiest way is to assemble the frame on the ground and then lift it onto the roof. The top beam or frame frame will act as a hearth in the attic. For fixation frame structure special boards or plywood are used on the surface of the house. In this way it is possible to obtain a special platform. The knots and quality of fastening depend on the material from which the attic walls are made. Self-tapping screws are used to connect the timber at the top of the structure. After production frame walls the roof should be thermally insulated and waterproofed. After this, external and internal wall cladding is carried out, windows and doors are installed, and interior finishing work is carried out.
When planning an attic you should carefully analyze general state main building. The attic can be one room or will consist of several rooms. At the design stage, you should also take into account the design and shape of the windows, as well as their location.
The attic should be constructed from light, but at the same time durable materials. Since the materials should easily rise to the roof and place minimal load on the base of the building.
The most optimal materials for the construction of an attic - wood or steel profile. An attic made of stone or concrete will load the main building. Roof finishing materials should also be light, but at the same time durable and reliable. Preferably used for roofing bitumen shingles or piece metal. We recommend using plasterboard for interior wall decoration and leveling.
Since the attic is located above the main building, it is in greater contact with cold air. Therefore, proper thermal insulation of this room should be ensured. Heated air in the room should not penetrate through the insulation. In addition, in order to prevent moisture from entering the room, it is necessary to ensure its waterproofing.
In relation to the design features of the attic, it consists of a rafter system, which is installed in increments of sixty centimeters. To fill the gaps between the rafter system, it is recommended to install thermal insulation materials, such as mineral wool, inside them. It is possible to lay the insulation in one, two or even three layers. For calculation total thickness thermal insulation material, the overall heat loss coefficient in the room should be taken into account. To protect the roof from inside the room, a vapor barrier should be installed. Next, you should finish the roof using plasterboard, lining or finishing panels.
Do not forget to leave a ventilation gap, the main function of which will be to get rid of excess moisture in the under-roof space. The width of this gap directly depends on the type of roofing material. A vapor-permeable wind barrier should be installed on the outside of the heat-insulating material.
An excellent vapor barrier material is polyethylene film, glassine or roofing felt. The insulation is laid with an overlap of 15 cm. Construction tape is used to seal the seams. Please note that foil waterproofing is laid with a foil covering inside the room. Thus, the foil will reflect the heat that comes from the room.
Construction of the attic video:
Construction of attics in Lately has broken all records of popularity - the cost of housing is rising, and the attic allows you to get additional living space with minimal investment. However, the construction of such a roof has its own specifics and nuances that should be taken into account in order to obtain the expected result. In this article we will look in detail at all the intricacies of building an attic with your own hands.
It is necessary to begin the construction of an attic by creating a plan and assessing the condition of the supporting structures. In some cases, the foundation cannot cope with the additional load, for example, if you decide to build an attic on an old house. To prevent the foundation from sinking into the ground and cracking, it is necessary to conduct a study and, if necessary, strengthen the foundation. The second question that needs to be resolved is to decide on the type of construction of the future attic. This means choosing the roof shape and finishing material. Not only the appearance of the facade, but also the dimensions will depend on this internal space. DraftingThe design stage, from which any serious construction should begin, is fundamental for all further work. Not only the final result, but also savings on building materials and personal time depend on the accuracy of the calculations. It is better to immediately take the creation of an attic project seriously, so as not to spend money on correcting your own mistakes later. First of all, it is necessary to analyze the specific layout of the building on which the attic will be built. The analysis should include the dimensions of the walls of the future structure, the shape of the roof, finishing materials, the location of windows, doors, balconies, stairs, etc. It is important to take into account every little detail, right down to what sockets you will install and what devices will be connected to them.
The corresponding SNiP, which sets out in detail the standards and requirements for construction, can help in drawing up a plan for the attic. For example, the line between the roof and the facade wall should be no less than 150 cm from the attic floor. What you should pay special attention to when creating an attic project:  These points should form the basis of the attic project, and if you identify them, the work will be much easier. If you have never done this kind of work, we recommend that you familiarize yourself with attic projects on the websites of development companies or private firms so as not to miss any important detail. Calculation of raftersThe calculation of the roof truss system must be carried out very accurately and competently, since it depends on it whether they will withstand load-bearing walls attic load. Depending on the angle of the rafters and the configuration of the roof, the load changes. If you doubt the strength of the walls, it is better to immediately strengthen them or choose a roof structure that is not too heavy. Installed building codes will help you perform an engineering calculation of the rafter system:
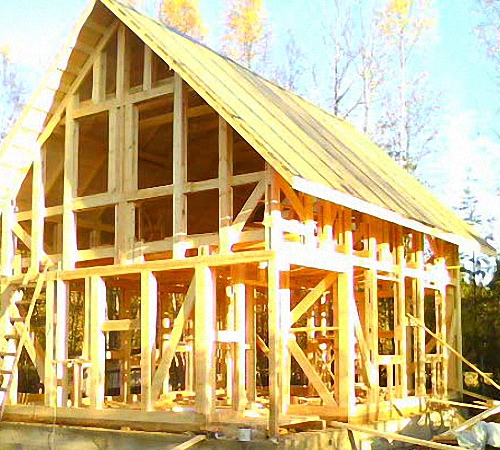
The most common roof option for an attic is a gable sloping roof, but in this case the load on the walls will be significantly greater than, say, a lean-to structure. But the advantage of a sloping roof is that it provides the highest possible usable area attics. Regardless of the type of roof chosen, it is necessary to create a powerful frame with a sufficient number of load-bearing supports that can withstand vertical and horizontal loads. Design FeaturesIf you want to build an attic on an old house, you will need to dismantle the old roof before doing so. After dismantling, you can begin installing the load-bearing structural elements - the Mauerlat. Mauerlat for the atticTo fix the Mauerlat, experts recommend using anchor bolts with a diameter of at least 12 mm and fixing them in a layer of reinforced concrete. Before installing the anchor, bend its end so that you get a hook - this way you will protect the fastener from accidental pulling out. Professional designers make a detailed drawing of the attic, where the points of attachment of the Mauerlat to the wall are drawn separately. The required number of anchors and their sizes are usually indicated there. The bolt installation pitch can be from 100 to 150 cm.
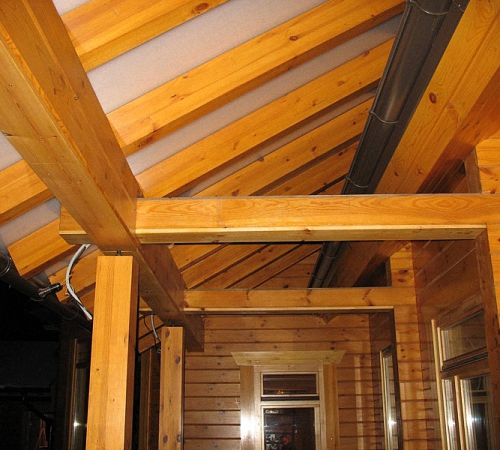
Mauerlat is a powerful beam with a cross-section of 150x150 or 200x200, placed at the convergence point of the roof and the load-bearing wall of the house. To install a gable roof, you need to install two beams, and for a 4-pitched roof you will need, you guessed it, 4 beams. The fastening elements of the Mauerlat should be located between the rafter beams so that there are not too many inserts in it, which can negatively affect the load-bearing capacity. For example, if you build an attic with your own hands with rafters located a meter apart from each other, then the anchors should also go in increments of a meter, but with an offset of 50 cm in order to fit just between the rafters. Helpful tip: always use only galvanized bolts to fasten the Mauerlat to prevent rust. Install the support beam on a layer of waterproofing material. This can be ordinary roofing felt, polyethylene film or a modern waterproof membrane. If you are making an attic in brick house, anchors can be installed at the time of construction of load-bearing walls. To fix the beam in the Mauerlat, drill holes with a diameter equal to the diameter of the studs, and when the beam is in place, secure it with nuts. Rafter systemThe Mauerlat is the basis of the rafter system, and it, in turn, is the “skeleton” of the roof. This supporting structure must withstand the weight of the entire roofing pie and external loads - wind, snow, water, etc. Requirements for rafter systems are described in SNiP depending on the type of roof and climatic conditions of the region.
To arrange the rafter system, you will need the usual tools that every owner has - a hammer, an ax, a hacksaw, a level, a construction stapler, a plumb line, a tape measure. To build an attic from timber and be sure of its durability, choose strong products without defects with a cross-section of 100x100 mm for racks and rafter boards with a suitable cross-section. For fasteners you will need 100-120 mm nails, powerful metal staples and an antifungal compound for treating wooden elements. In a good way, all beams and boards should be treated with disinfectants and fire retardants. The highest quality rafters are made from pine and larch. The moisture content of the material should be no more than 22%. Rafters can be inclined or hanging. The inclined elements rest against the load-bearing wall at one end, and against the purlin or rack at the other. Hanging ones allow you to organize a small canopy of the roof slope over the wall of the house, thus providing additional protection from moisture and cold. The rafters at the ridge of the roof are connected with an overlap or overhead dies. Important: Rafter racks are attached to the Mauerlat if used wooden beams floors, and if construction is carried out on reinforced concrete slab, racks can be placed at any point. During the construction of an attic roof, it is very important to properly organize the system of diagonal braces and struts. To prevent the elements from bending over time, it is necessary to install a horizontal crossbar. For very wide buildings, it is recommended to install hanging rafters, tightened with a tie.
In some cases, not only wooden but also metal elements are used to construct the rafter “skeleton”, however, the difference in the thermal conductivity coefficients of the materials can lead to deformations. In addition, metal parts require additional waterproofing. Roof installationEach type of roof has its own installation technology, but there are common points that require special attention. So, valleys, regardless of the roofing material, are more difficult to do than laying the covering, and additional problems may arise with the junctions. Therefore, it is important to strictly follow the installation instructions so that in the future the junctions with pipes or walls do not cause trouble. How to build an attic:  A video on how to build an attic with your own hands will allow you to better understand the whole process: Thermal insulation of the atticSeparately, I would like to dwell on the thermal insulation of the attic. Insulating an attic space consists of three stages: protecting the floor, gables and ceiling. You can use one insulation for all surfaces, the main thing is that it is resistant to moisture, has low thermal conductivity, does not burn and is environmentally friendly. Many modern materials of varying costs fall under these requirements. The most inexpensive ones include polystyrene foam, polystyrene foam boards, and mineral wool. Fiberboard slabs can be used for the attic located above the bathhouse. Let's consider the most popular insulation for attics:
We told you how to properly build an attic, using the most economical materials and proven installation methods. Interior decoration is carried out in the same way as in the rest of the house. You can wallpaper the walls, paint them, lay the floor with laminate or lay a warm carpet. |


It is difficult these days to imagine the layout of a house without an attic. It is also built in old buildings, thus adding living space instead of an outdated attic.
When creating a new building, the issue of constructing an attic is decided in advance in the project. If you are building an attic yourself in an old house, then you need to carefully study all the requirements for reconstruction or an extension to an already finished building.
What is an attic
An attic is a living space resembling an attic, which is formed on the upper floors of houses with an attic roof. Anyone with special skills in the construction process can build an attic on their own.
The attic floor is understood as a floor in the attic, the façade of which is formed entirely or partially by the surfaces of a sloping or sloping roof. In fact, it is a full-fledged living space inside the building.
To reduce the load on an already erected structure, lightweight materials and structures are used during construction of the attic floor. Wood is indispensable in these matters. The attic is often built independently from wood; beams, logs or frame-panel technology are used for this purpose.
Types of attics

Types of gable roofs: options for the purpose of the structure
The shape of the attic room depends on. The attic can cover the entire building or only part of it. Rooms with it can be symmetrical or asymmetrical. The shape is often triangular or broken. True, not every roof is designed for the construction of an attic.
Attic roofing comes in the following types:
- 1-slope;
- 2-slope;
- broken line;
- hip;
- tent (pyramidal, round, conical).
Let's take a closer look:
- A pitched roof is erected very rarely. Due to the high difference between the heights of the walls, such an attic will become asymmetrical and it will be difficult to install windows.
- A gable roof often involves arranging the attic symmetrically. It will have sloping internal walls. When constructing this roof, elongated boards are used, which is not cheap. True, the performance indicators of this roof are quite high. A serious advantage is that with such a roof it is possible installation full windows and doors along which there is an exit to the balcony.
- Broken roof. The attic will have vertical walls. The structure itself reaches a width of more than 5 m. The material consumed for this type of roof is much less than for a gable roof.
- A hip roof makes it possible to create a comfortable and small attic. It includes 2 slopes, shaped like a trapezoid and a triangle. The windows are on the ceiling slopes.
- Hip roofing is also used for the construction of an attic. Windows must have a special shape and are made according to individual projects.
All of the above types of structures have their own advantages and disadvantages. Symmetrical structures have a more straightforward design; the project does not involve complex calculations, compared to the installation of asymmetrical coatings.
What is needed for construction
It should be understood that the construction of an attic is enough difficult process. Here you need to have the proper experience and skills in the construction industry. Before construction work, you should carefully study all the design features of the attic floor, installation methods, as well as situations when it is not possible to complete it.
Materials, tools and project
To build an attic you will need the following materials:
- wooden beams (section sizes vary depending on the dimensions of the building and the angle of inclination of the slope);
- wood boards for sheathing;
- material to sheathe the end walls;
- fasteners for roof installation;
- thermal insulation;
- waterproofing;
- material for interior decoration of the attic.
To build an attic yourself you will need the following tool:
- screwdriver;
- hammer;
- level;
- roulette;
- lace;
- saw for woodworking.
Design is considered one of the most important elements of the work, since without it it is not recommended to begin the construction process itself.
If you are not conscientious at this stage, then you can easily lose sight of some detail, which then requires large financial resources to eliminate the error. Before constructing the attic, you will need to make a thorough analysis of the layout features of the room that is to be refurbished.
Well-known requirements that serve as a template for construction are found in SNiP. In addition, you need to take into account the following details:
- Geometric features of the roof.
- Creating conditions for the joint functioning of roofing engineering systems and other parts of the house.
- Selecting the proper material for construction work.
- Roof of the attic floor. Attics with round-sloped roofs require special waterproofing and special insulation.

Construction of the attic
The layout of the attic can be carried out both during the construction work and during the construction of the attic on a pre-finished building. You should first carefully check the foundation of the building.
It is extremely important to correctly calculate the load of the attic on the building, since the quality of the attic and the general condition of the entire home will depend on this factor.
Detailed step-by-step instructions

Mansard roof rafter system
- First you need to have wood beams. They should be applied on top of the waterproofing material. The optimal ones include roofing felt or roofing felt, sold in rolls. When working with them, you do not need any specialized skills. In case of creation wooden floor there is no need to install an auxiliary beam.
- Next, the racks are mounted on the beams. They represent the specific skeleton of the walls of the attic being built. For best performance, they should be placed no further than 2 m between them. Each post must be level. After installation, it is recommended to sheathe them on both sides. You must remember to lay the insulation in the middle of the studs. Each rack must be individually secured using spikes and brackets.
- Then the top beam is laid. It can be fixed by any in a convenient way. It is important that the beams must be strong and durable.
- Next is installed. Thanks to it, a high level of strength is ensured when fastening the roof rafters to the wall. It will make it possible to direct the weight of the roof onto the walls. Since the Mauerlat is located on the wall, the load on it is small. The main thing is not to forget to lay a layer of waterproofing underneath it to avoid further rotting.
- If the Mauerlat is properly secured, then it will protect the roof from the influence of wind and snow in winter. To secure it, use annealed wire with a diameter of up to 0.5 cm.
- Next, the rafters are installed. Markings are first applied to the rafter frame and mauerlat in the place where the rafter legs will be installed. Only boards with a perfectly flat surface are suitable for rafters.
- The rafters rest on a ridge beam. If the attic is large enough in area, then, of course, the weight of the entire roof will become large. Due to this, the beam is considered an essential part of the structure. If rafter legs length is less than 8 m, then ordinary guy wires will be quite useful.
- Installation of fillies. It is carried out in the same way as the rafter legs.
- Then the hem board should be nailed to the fillies. It will prevent the influence of wind and virtually any natural precipitation.
- Before installing the roof, you need to decide where the windows will be installed. Their total area is no less than 13-14% of the area of the side walls. In the place where windows are installed, the rafter legs should be strengthened. For these purposes, transverse bars are installed.
Additional work
In order for the attic to have a long service life, it is necessary to carry out a number of additional work associated with an increase in its resistance to the effects of mechanical and natural natural factors.
Insulation and waterproofing
- When creating it yourself mansard roof its insulation plays an important role. The implementation of these works begins after the installation of the rafters. The area where it interfaces with the environment is quite large, so high-quality insulation (for example, mineral wool) is needed. The insulation itself is protected on both sides. Steam can penetrate inside, and water can penetrate from outside. The most popular material is membrane film.
- From the outside, where the ventilated air layer is located, the insulation is protected by waterproofing, a windproof, vapor-permeable membrane. It is impossible to use materials that are also vapor barriers for installation in the roof or attic, as waterproofing and windproof membranes. Installation of waterproofing and wind protection is done on top of the roof rafters. Waterproofing is attached to them using wooden beams or a stapler. After installation, waterproofing joints are carefully taped. Waterproofing is installed in order to protect the insulation from high humidity
- from precipitation that gets into the gaps during gusts of wind, as well as from condensation on the other side of the roof. The ventilation of the attic floor should be carefully arranged.

Since now this is a living space, it is necessary to create proper living conditions. The main problem with its microclimate is the heat coming from the lower floors and causing condensation to accumulate on the insulation. Condensation has a detrimental effect on it and this can lead to rotting and destruction. To protect it, a vapor barrier layer is added. If condensation still accumulates on the thermal insulation layer, you should think about a forced ventilation system.
Insulating the attic with foam plastic
Attic finishing
Finishing work of the attic with plasterboard
First, the roof slopes and gables are sheathed, then the ceiling is finished. To sheathe the roof slopes, beams are mounted horizontally on the rafters in increments of 1 m, then horizontal beams are mounted in the gaps.
The next step will be to measure the drywall according to the given dimensions and its subsequent installation on the base. quite simple, but at the same time quite labor-intensive process. When everything is completed, all gaps and cracks should be sealed.
Finishing work of the attic with clapboard Wood-look finishing work is quite in demand for attics, and the installation of the lining itself is simple. She is cut off required height
After each sheet of lining it is necessary to inspect its position using a level, otherwise there will be a risk of a large distortion at the end of the wall. When the installation of the lining is completed, it should be covered with several layers of varnish.

- Choosing the optimal attic roof option increases the living space in the building. Various types of roof structures can be installed not only during the construction of a building, but also during the reconstruction of a building. With the latter option, you need to calculate in advance the ability of the base and walls to withstand additional loads.
- The design of the attic roof involves the installation of a rafter system made of carefully dried wooden beams.
- To make structural elements, beams of various sections are used. Installation of the attic is done using light and safe material. Insulating the attic inside the room, which is located under the roof, loses heat more quickly than the lower floors. Because of this, the roof must include reliable insulation. It is installed in the middle of the outer waterproofing layer and a vapor barrier on the room side. A well-made pie ensures long lasting service life the entire roofing system. For the interior decoration of the attic space, natural wood is most often used. But the cladding of walls and ceilings can be done by others

sheet materials
, including drywall.
The attic floor these days is an essential element of modern private buildings. Between the roof and the top floor of the house you can arrange a bathroom, a bedroom, and an office. The area and configuration of such rooms will primarily depend on the type of roof.
Making an attic with your own hands is a completely simple process if you carefully study all the nuances of the construction process, and also comply with all the requirements and expert advice described above.
In fact, an attic is an attic, the design of which is regulated by SNiP standards, which entails modifications not only to the roof, but also changes in the thermal and waterproofing of the upper extension.
In order for a do-it-yourself attic to be reliable, warm, not to harm the load-bearing walls and foundation of the house, and to last for a long time, it is necessary to understand the specifics and know the design features of this type of superstructure. In the article we will talk about the main types of attic floors, what materials an extension can be made from, as well as the specifics and nuances of the stage-by-stage construction of an attic with your own hands.
DIY attic floor above the garage
Main types of attics
Do-it-yourself attic construction begins with choosing the type of extension, the most suitable design for the main building, and making the project. For the superstructure, shed, gable and sloping roofs are used: hipped, domed, etc. The appearance of the attic floor is determined by the materials, design features of the building and the specifics assigned to the completion.
Depending on the specific nature of the main building, standard solutions are usually used when constructing an attic.

1.Gable; 2. Broken gable; 3.Single-level; 4.Multi-level
- A single-level with a gable roof is an ordinary attic under a gable roof, converted and insulated into an attic. Designing and building such a room is not difficult, but the main drawback is the small interior usable space with a low ceiling.
- Single-level under a broken line gable roof has four pitched planes, which are located at different angles. The construction of an attic floor of this type is somewhat more expensive and more complex to design, but the result is a large interior space.
- A single-level attic with remote consoles presents some difficulties during design and construction. But the spacious interior space and the possibility of installing vertical windows compensate for the difficulties during construction. A feature of the construction of such an attic frame is the displacement and extension of the extension beyond the sides of the house, and the attic roof is identical in appearance to a pitched roof.
- Multi-level extension with mixed roof support. This complex design attic, which requires professional calculations and design of not only the room itself, but also the stairs to the attic. As a rule, such attic floors, with multi-level rooms, are planned together with the construction of the main house, as a solid structure.
Materials
The house is built on a foundation that is specially designed to support the weight of the structure. If the attic floor is planned initially, the load is calculated and applied at the attic design stage, so the attic floor can be built from any materials: monolithic attic made of concrete, brick, foam concrete, metal constructions, made of galvanized logs. But if the superstructure of the attic floor is carried out after the construction of the house, then the weight of the superstructure must be calculated in accordance with the load on the foundation and load-bearing walls. Accordingly, in order for the superstructure not to damage the house, the material must be light, for example, wooden beams, frame-panel structures, in some cases the building is made of aerated concrete, which has good heat and vapor barrier properties, and vulture panels.
Attic construction
Projects of attic floors involve the use of walls various materials, but, in essence, the attic structure is pitched roofs resting on the walls. Of course, different options for attic floor extensions have their own characteristics, but in general they consist of the following elements:
- Roof.
- Lathing from wooden boards, on which the roofing and insulating materials are attached.
- Ridge purlin - top truss structure.
- Rafters for the attic roof are stiffening ribs, layered or hanging. In the attic, layered rafters are usually made.
- Mauerlat - beams that are laid around the perimeter external walls and are connected to the walls with special fasteners. A rafter structure is attached to the Mauerlat.
- Diagonal connections (bevels) for the reliability and strength of the attic; they are used to connect rafters, longitudinal beams and vertical posts.
- Internal supports give the attic stability, if the attic area is large, they support the ridge girder and rafters.
- An insulating layer consisting of waterproofing, insulation, sound and vapor insulators. Provides temperature conditions and moisture exchange between the main walls and roof.
The minimum distance from the floor to the highest point of the ceiling in accordance with SNiP should be 2.5 m. If the height is less, then the room is an attic.

We build an attic with our own hands, the main connecting nodes:
A – ridge knot. B – rafter+screed+stand. B – rafter + ceiling beam D – ceiling beam + rack + strut. D – rack + strut
Construction technology
The attic walls are drawn as close as possible to the walls of the main building, so achieving comfortable heat exchange is extremely difficult. It is very important to choose the right materials for insulation, make ventilation, the entire structure must be erected in accordance with the drawings and calculations, and the wooden parts must be treated with a fire-fighting compound.

Do-it-yourself attic installation, how to properly attach the components
Rules for the installation of the attic floor
In order for a do-it-yourself attic to serve for many years, it is necessary to fulfill the conditions specified in SNiP standards:
- The rafters should be 250 mm or more; it is better to use laminated veneer lumber. This thickness is due to the possibility of laying insulation between the rafters with a thickness of at least 200 mm.
- Insulation materials should not lose their properties at high humidity; it is best to use foamed polystyrene, which is lightweight and has a low heat transfer coefficient. Mineral wool absorbs moisture and breaks down.
- There must be adequate ventilation between the thermal insulation and the roof, with hoods and vents, so that air can circulate freely under the entire surface of the roof of the attic floor.
- It is imperative to install a vapor barrier layer inside.
- Placed on the outside of the rafters waterproofing layer, it is recommended to additionally lay a layer of sound insulation.
Step-by-step instructions on how to make an attic with your own hands
Building an attic with your own hands is fraught with some difficulties, since the elements of the superstructure are at an angle, the installation of broken slopes and dormer windows requires compliance with SNiP standards in the part “Loads and impacts”.
When making a drawing of the installation floor yourself, you need to accurately calculate the loads, angles of inclination, permissible weight of the structure, and, in accordance with preliminary calculations, select the appropriate type of attic and materials for construction.
Do-it-yourself attic construction begins with the installation of mooring strips around the perimeter of the house, usually timber with a cross-section of 100*100 mm is used for this.
Next we build the frame for the room. The racks can be made of timber with a cross-section equal to the longitudinal beams, possibly from foam concrete or metal. We fix the vertical posts at the corners of the post structure, and then install the beams between them, with a step of no more than 2 meters, equal to the location of the attic rafters. All parts are attached to metal corners, nail plates or self-tapping screws.

We build the frame of the internal attic space; instead of vertical wooden posts there may be a wall made of foam concrete blocks or a metal frame
We tighten the jumper over the rack and secure the structure. Use a construction cord to monitor the geometry of the building.
We attach the lower rafters to the resulting frame. The beam is cut to the calculated length, a groove is made at the base for reliable fastening to the Mauerlat, the top of the beam is cut off according to the calculated angle of inclination. The installation of the lower rafters is carried out in place and securely fixed.

Do-it-yourself attic installation, photo of fastening the lower rafters, instead of vertical wooden posts there can be a wall made of foam concrete blocks or a metal frame
The next step is to install the upper rafters. The difficulty lies in maintaining the angle and centering of the structure as a whole.
Advice: To ensure that the angle of attachment of the rafters does not go astray, first a template is made from two boards that exactly corresponds to the connection of the rafters. The beams are cut to a template on the ground and then installed on the frame.
Do-it-yourself frame attic, installation of the upper rafter structure

Installation of an attic, construction of sheathing for roofing material
The next step is creating an insulating layer. It is recommended to use non-toxic and non-flammable materials, this is especially true if a nursery or bedroom will be located on the attic floor. WITH inside We lay a vapor barrier on the rafter frame and secure it with staples. Then a layer of insulation is installed, it is important that it fits tightly to the rafters, without gaps. We install lathing on the heat-insulating layer with a pitch of 500 mm, which will fix the insulation.

We build an attic with our own hands, installation of roofing material
We lay a waterproofing layer on the sheathing, which will protect the wooden elements from moisture. The roof is laid on the waterproofing.
Do-it-yourself attic construction, video materials clearly demonstrate how to correctly install rafters in practice.
This video shows typical mistakes made when installing an attic floor.
Features of adding an attic with your own hands to an old house
If you plan to complete the attic in an old private house or country house to create additional living space, then in this case the issue of dismantling the roof is relevant. You can dismantle it yourself; be sure to follow safety precautions so that the beams do not fall on your head.
The construction of an attic involves certain loads on the foundation and walls of the building. It is especially important to correctly distribute the loads on the walls, so before building the attic, the load-bearing wall structures are carefully strengthened.
Important: When designing, the strength of the walls should be taken into account, taking into account the wear and tear of the structure.The ceiling of an old house is both the ceiling of the adjacent floor and the floor of the attic, so it is necessary to take into account the movement of warm and humid flows so that condensation does not form in the ceiling, and as a result, rot and fungi. To avoid problems, you need high-quality insulation and waterproofing of the ceiling.
After completing the preparatory procedures, you can begin to join and construct the attic floor. During completion, it is important to strictly adhere to the design scheme for the construction of the walls and roof of the attic. Violation of the project not only entails deviations from the design of the attic floor, but also improper distribution of the load on the supporting structures can lead to the destruction of the walls and foundation of the house.
The easiest and most reliable way to increase useful living space in an old house is to create an attic with your own hands. A video on how to build an attic floor in a frame house will help you avoid global mistakes and tell you the nuances of how best to build an attic with your own hands. Work carried out in accordance with the attic floor construction technology guarantees reliability and safe operation extensions.
Modern people try to make the most of the space in their home. Therefore, the proposal to arrange additional space under the roof is always met with enthusiasm. It is much easier to plan the construction of an attic at the stage of building a house, but you can make an additional superstructure over an old building.
How to make an attic on an old house
The presence of an attic not only increases the living space, but also gives the building a colorful look.
The attic turns a country house into a fabulous building
An old house can be updated by building an extension in accordance with existing codes.
The attic addition begins with calculating the strength of the old house
First you need to decide whether the existing foundation and walls can withstand the load of the attic floor and the new roof. If they have a sufficient margin of safety, then you can begin to remodel the house. Otherwise, they should be strengthened.
Old brick walls sometimes they seem durable, but with additional load over time, cracks may appear in the solution. Therefore, it is necessary to immediately examine their condition, and, if necessary, tie them with a rigid belt. This is done as follows:
- metal pillars with a cross section of 10x10 cm are inserted into the foundation with their lower edge, and connected with the armored belt of the first floor with their upper edge. Installed around the perimeter of the house every 2 meters;
- metal reinforcement with a cross-section of 12 mm is laid in grooves and tied around the walls of the house: from the bottom of the window every 2 meters upward;
- A metal mesh with a mesh size of 2x2 cm is laid over the reinforcement, which is covered with plaster after all work is completed.
The foundation is strengthened by tying it with a reinforcing belt on all sides.
If the old foundation cannot support the attic, then it must be sheathed with reinforcement
Having decided on the strengthening of the building, you can proceed to choosing a project for the future superstructure. It should look harmonious against the background of other buildings and match the style of the entire house.
The calculation of the dimensions of the internal upper room and the necessary materials for construction will depend on the type of attic roof
There are several types of attics:
- single-level with a gable roof - low ceilings with a small living area;
A single-level attic with a gable roof is the simplest type of superstructure for small buildings
- single-level with a sloping gable roof - increased internal space, but serious costs of money and time for construction;
A one-level attic with a sloping gable roof is usually built on a brick house
- single-level with cantilever extensions - a complex design that allows you to get even more space, since the attic frame extends beyond the building and the windows are installed vertically;
A single-level attic with cantilevered extensions allows you to get a lot of internal space by increasing the upper structure
- multi-level with mixed roof support - used in the construction of a new house, built only by specialists.
A multi-level attic with mixed roof support is usually not installed on old houses due to the complexity and large volumes works
Video: converting half of an old roof into an attic - an easy way
Converting the roof into an attic is a relatively cheap way to increase living space. In a private house it is usually installed pitched roof, so you can make an additional spacious and bright room with your own hands.
Internal wood lining makes the attic warm and bright
And if the house is large enough in length, then the attic can turn into a real floor: with several rooms and even a balcony.
A large attic allows you to divide the area into different living areas
Advantages of creating an attic:
- the possibility of installing one or more new living rooms;
It is most convenient to furnish an attic with low ceilings under a gable roof with low sun loungers
- low costs compared to the construction of a full floor or side extension to the house;
- updating the external appearance of the building;
A house with an attic under construction always attracts the attention of passers-by and makes them interested in the final result.
- opportunity to observe beautiful view from the attic window.
A lot passes through the windows in the attic sunlight, illuminating the room all day
However, this solution also has certain disadvantages that must also be taken into account:
- the need for insulation and soundproofing of the ceiling and a new roof, installation of several double-glazed windows;
- the difficulty of installing additional heating and lighting in the upper part of the old house - you will have to combine it with home wiring or use an autonomous connection;
To heat the attic with access to the balcony, you can use a stove-stove
- planning part of the home space for a staircase leading to the attic;
The staircase leading to the attic must be fenced for safety
- the need to purchase special furniture for a sloping roof or purchase squat models: low cabinets, sofas and tables.
Low furniture is best suited for attic interiors
The presence of sloping walls makes the room unusual and romantic, but with this decision you will have to take a more responsible approach to design development. You can make furniture for the inclined superstructure yourself or assemble a single set from existing multi-level models, painting everything in the same color.
You can make furniture that follows the slope of the attic yourself
So, the main disadvantage of converting an attic space into a loft is that it requires an investment, but it is worth it.
Building an attic will cost much less than creating an additional floor, regardless of what materials are used to build the walls. After all, to create them you will need basic material, insulation and finishing, while for an attic superstructure you only need roofing insulation and a new rafter system.
The superstructure is made of symmetrical or asymmetrical shape. Internal walls are designed both inclined and vertical.
Having studied the schemes of single-level attics with different types roofs, it is easier to make a choice when planning
Converting an attic into an attic does not require dismantling all existing structures. But you need to make sure that the ceiling is reliable: check its condition, reinforce it with wooden or metal beams, and cover it with new boards. Then it will be able to withstand the weight of furniture and people.
To frequently go up to the attic, you will need to make a convenient staircase, provide for the installation of ventilation, natural and artificial lighting, and carry out interior decoration - all this will allow you to create a cozy and comfortable room.
Superstructure with a sloping roof, decorated in light colors, visually increases the space, and color spots add brightness to the interior
When constructing an attic floor, the following conditions must be met:
- the rafters are made of laminated timber with a thickness of at least 250 mm, so that the required amount of insulation can be laid;
- Foamed polystyrene is used for insulation due to its low weight and high thermal insulation characteristics;
- a gap is left between the thermal insulation and the roofing material to ensure natural ventilation;
- A hydro- and sound-proofing layer must be laid.
Converting the roof into an attic with your own hands
During the construction of a house, there is usually a lack of funds, so many people refuse to build a second floor. Or another situation may arise when an old one-story small house is purchased along with the plot. In both cases there is affordable option increasing the living space - rebuilding the attic space into an attic with your own hands.
Creating a Project
Before starting work, you need to draw up a plan and develop a project with accurate drawings. Correct calculation will allow you to get a cozy, durable and reliable room. You can perform all the calculations yourself or entrust it to specialists.
You can draw a plan and develop a preliminary design yourself by studying different variants in the Internet
Strengthening the walls and foundation may be necessary if complete replacement rafters If the roof is partially redone, then reinforcement may be necessary only for the ceiling. You also need to immediately decide what types of windows will be used in the attic: the reinforcement in the rafter system will depend on this.
The location of all windows in the attic roof must be thought out in advance and this data must be included in the project plan
Rafter system
Rafters can be layered or hanging. The first ones rely on interior walls houses or additional supports, and the second - on external walls.
In attics, layered and hanging rafters are used
Hanging rafters are best suited for the attic.
Attic with hanging rafters looks more beautiful and benefits in the size of the internal area
The attic usually occupies the entire space of the attic, and its walls are combined with external ones.
The best option for creating an attic is a layered rafter system
The rafter system consists of different load-bearing beams. To understand the structure of the entire structure and build it correctly, you need to understand the purpose and operation of its individual elements.
An image of individual elements of the rafter system helps to understand the structure of the entire structure
Refurbishment of premises
If the attic height is sufficient, the rafter system does not need to be altered. It is enough to inspect the old rafters, identify possible flaws and eliminate them.
If the rafter system is in good condition, you can begin arranging the floor. Insulation is first laid between the joists, after which the surface is sheathed with ordinary boards or sheets of OSB or chipboard.
The floor in the attic is insulated and covered with boards
Before laying the insulation, all necessary communications are installed between the rafters, and places are cut in the roof for installing windows. carried out before insulation.
All wires and pipes of communications must be placed in special corrugations
Care must be taken to create natural ventilation under-roof space through vents so that moisture does not accumulate inside the room.
Roof insulation
The roof must be insulated correctly and efficiently - the microclimate under the roof will depend on this. Typically, mineral wool, polystyrene foam or sprayed polyurethane foam are used as insulation.
A thick layer of heat insulation is tightly laid and fixed between the rafters so that there are no cracks or gaps left anywhere. Waterproofing is installed along the upper part of the roof - between the roof and the insulation - and then thermal insulation material is laid on the side of the room. Then the inside of the insulation is covered with a vapor barrier film.
For better ventilation a small distance is left between the roofing material and the insulation: this way air circulates through the holes in the eaves and ridge. If the roof is covered wavy sheets, then the gap thickness should be 25 mm, but if flat material, then you need to bring it to 50 mm.
When creating thermal insulation for an attic, the sequence of layers must be strictly observed.
When planning to climb to the attic, you need to take care of the convenience and safety of movement. Therefore, the staircase is usually installed inside the house. It is constructed from wood or metal: it can be either a screw or a marching structure.
The staircase to the attic may be different types and designs, which allows it to fit into any interior
An opening is cut in the ceiling of the first floor, which is reinforced around the perimeter with metal or wooden strapping.
The design of the stairs to the attic must be strong, reliable, safe and beautiful
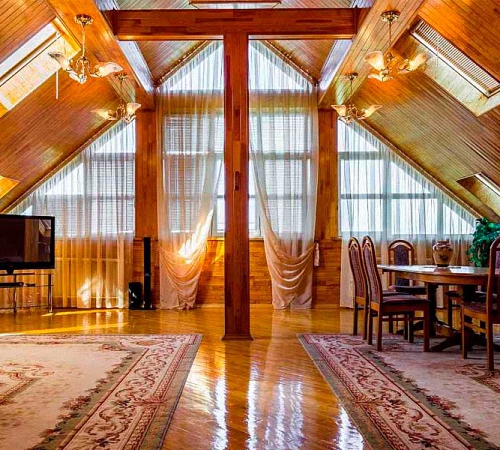
Interior decoration
In most cases, plasterboard slabs are used for wall cladding, and the seams between them are plastered. Wallpaper is pasted on top or decorative plaster is applied. An alternative option is lining or natural wood.
If some rafters protrude through the walls into the attic, then they can be designed as decorative elements and even use it as a horizontal bar for hanging a hammock, swing, chandelier and other devices.
Decorating the visible parts of the rafters in the interior of the attic is an interesting and creative matter.
It is not recommended to use heavy finishing materials in the attic, as they increase the load on the walls, ceiling and foundation of the building.
There are many options for interior decoration of the attic, but it is advisable to use only lightweight materials
To cover the floor, you can use laminate or linoleum, but it is better to avoid tiles or porcelain stoneware.
Installation of the roof of the attic floor
The roof of a residential superstructure must consist of the following layers (the order of arrangement is from the street to the internal space):

Video: why and how to properly lay layers on the attic roof
Calculations of an attic roof for a house
Determining the total weight of the roof
To calculate the total weight of roofing materials, you need specific gravity one square meter of coverage multiplied by total area mansard roof. To obtain the weight of one square meter, you need to add up the specific gravity of all the materials that make up the roofing pie, and multiply it by the safety factor (1.1).
If the thickness of the lathing is 25 mm, then its specific weight is 15 kg/m2, insulation 10 cm thick has a specific weight of 10 kg/m2, and the roofing material ondulin has a weight of 3 kg/m2. It turns out: (15+10+3)x1.1= 30.8 kg/m2.
According to existing standards, the floor load in a residential building should not exceed 50 kg/m2.
Determining the roof area
To calculate the surface sloping roof, you need to break it down into simple shapes (square, rectangle, trapezoid, etc.) and determine their area, and then add everything up. To determine the surface of a gable roof, you need to multiply the length by the width, and multiply the resulting value by two.
Table: determining the area of the attic roof
When calculating the angle of inclination, the climatic zone in which the house is located is taken into account, and that it is convenient to move in the attic at full height
It is also necessary to calculate the roof slope. Typically the angle is 45–60 degrees, but when determining it, one must take into account climate zone, in which the house is located, type of attic construction, snow, wind loads, architectural design of the house.
The greater the angle of inclination of the roof, the less will be the load on the rafter system, but the consumption of materials will increase.
Calculation of the rafter system
When choosing a rafter system, you can choose the following options:
- hanging rafters;
- inclined type;
- ridge run;
- combined design.
If the roof length is more than 4.5 m, then support purlins and struts can be used for reinforcement. If the length is more than 7 meters, a ridge beam is installed.
For wooden rafters, timber with a thickness of at least 70 mm is used. Their installation step should be 50 cm.
Over a large area, it is better to attach a metal rafter system: due to the increase in the distance between the rafters, the absence of spacers and struts, the weight of such a structure will be less than that of a wooden one, and the strength will increase significantly.
If the attic area is large, then it is better to install metal rafters
Calculation of the required amount of materials
To carry out the calculation you need to know the following parameters:
- width, thickness and pitch of rafters;
- distance from the edge of the roof to the rafters;
- the size of the sheathing boards and the pitch between them;
- size, type of roofing material and overlap between its sheets;
- type of steam, hydro and heat insulating material.
The roof is divided into simple shapes and the required amount of each material is determined. Simple mathematical formulas are used for this.
The results obtained are converted into standard values: for wood - in cubic meters, for roofing materials, steam, hydro and thermal insulation - in square meters. And you can go to the store.
Common mistakes
Most often, when doing independent calculations, errors occur when determining the required amount of insulation. If the climatic conditions are harsh, then its volume will have to be increased, otherwise it will not be possible to create in the attic comfortable conditions accommodation.
The insulation is installed on the floor of the house, gable walls and roof slopes. But everywhere the thickness of the insulation can be different.
Video: calculation of a mansard roof with diagrams and load The attic floor allows for additional living space and gives a private home a modern, attractive appearance. It’s not difficult to create an attic with your own hands, you just need to draw up the project correctly, perform calculations and carry out high-quality installation


