How to restore a bathtub cover. Do-it-yourself restoration of an old bathtub
Replacing a bathtub is a very expensive and troublesome undertaking, associated with great difficulties and quite significant financial costs. That is why most of those who have started repairs (especially not major, but cosmetic) are looking for alternative ways give this sanitary ware a neat appearance again. How to restore an old one cast iron bath- the masters of this field certainly know. But it’s quite possible to do most of the work yourself.
When is it time to renovate your bathtub?
A cast iron bathtub is the standard of quality, strength, and reliability in the plumbing world. It’s not for nothing that they recommend installing products made from this alloy in apartments. Many houses built back in the Soviet Union had just such bathtubs installed. Moreover, such baths are still used today. Also, a cast iron product is comfortable to use: it does not create noise, unlike, for example, a thin-walled iron bathtub. And it’s nice to wash in it - the bath retains the heat of the water poured into it much longer than others.

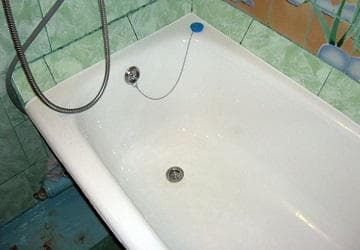
Unfortunately, even seemingly eternal things wear out over time. And a cast iron bath is no exception. In this case, it is not the structure itself that deteriorates, but the coating – the enamel, with which the structure was coated at the factory. And this special paint, applied using a special technology, begins to lose its appearance, and its performance characteristics deteriorate.
On a note! During production, cast iron bathtubs are coated with enamel after strong heating. It is due to this that it is possible to obtain high-quality adhesion of the base to the coating.

Signs that it's time to update your bath are listed below.
- Roughness inner surface . It is much more pleasant to step on smooth enamel than on pumice-like enamel.
- Cleaning the bathtub is becoming increasingly difficult. The reason is the same rough surface on which an ordinary sponge no longer glides easily and pleasantly. It takes a lot of effort to clean a bathtub.
- Dirt and rust quickly and strongly eat into the enamel due to loss of smoothness. In some cases, contamination cannot be removed completely.
- The appearance of chips and cracks on the surface of the enamel.

Attention! Enamel chips are dangerous for the entire structure. The fact is that enamel paint protects cast iron from exposure to water and aggressive chemicals for cleaning plumbing fixtures. In places where there are chips, rust forms quite quickly and gradually begins to spread throughout the entire structure right under the enamel.

It is these signs that inform the owner of the bath that it is time for her to “rest.” But don’t rush to dismantle it and throw it away - the bathtub can be revived! And for this there are three quite simple and also relatively inexpensive way– this is the use of an acrylic liner, the “fill-in bath” technique and renewal of the enamel.
Three ways to update your bath
All these methods differ from each other in price, quality, speed of work and complexity of implementation. But it’s worth considering them all to choose the one that suits you best. Each method has its own advantages and disadvantages, which are important to know in order to make the right choice.

Painting the bath
Self-enamelling or, more simply put, painting the inside of the bathtub with special coloring compounds in order to renew the coating is one of oldest methods restoration, which has already stood the test of time.

The work is carried out using a brush and special kits for restoration, which include the hardener itself, and the kit may also contain colors various colors, which will allow you to change the color of the bath and make it as harmonious as possible in a certain color scheme interior By the way, you can buy such coloring pigments yourself, and then simply add them to the coloring composition diluted according to all the rules.

The paint is applied to the surface of the bathtub, previously cleaned of dirt and rust. Before starting work, it is advisable to sand the walls using grinder, wash, and then degrease with any means (for example, acetone).
Important! Before the enamel is applied, the bath is well heated. This can be done using a hair dryer or by typing hot water. However, after using the second method, the surface of the structure will have to be thoroughly dried. Otherwise, the paint will not adhere as it should.
It is most convenient to work with a brush, but there are also those compositions that are perfectly applied to the surface of cast iron using a small paint roller. There are restoration compositions for enameling bathtubs and in aerosol cans, but they are not recommended for use on large areas, since the paint coming out of them often lies unevenly on the surface, and therefore drips may remain. By the way, some compositions, especially professional ones, may have increased or decreased fluidity, which can complicate the work of a beginner. Therefore, it is worth buying non-professional kits.

Attention! All compounds used for enameling bathtubs are very toxic, and therefore it is important to work in a respirator and rubberized gloves. It should also be ensured good ventilation in the apartment and remove children and animals from the house.
It will take about a week to completely restore the bathtub using this method. The fact is that the enamel is applied in several layers, and each of them should be thoroughly dried before applying the next. TO , You can read in our article.
| Advantages | Flaws |
|---|---|
| A cheap and accessible way to restore bathtubs. | The enamel is sensitive to shock and cracks easily. Over time (and quite quickly), chips may appear. |
| You can do the work of enameling a bathtub yourself, and the tools for this are sold at any hardware store. In this case, you do not need to have special skills to apply enamel. | The enamel does not cover large irregularities - they need preliminary refinement. |
| During the work, plumbing fixtures will not be dismantled. | Over time White paint will begin to turn yellow. |
| This is enough quick way bath restoration. | You need to take care of such a bathroom very carefully - do not use aggressive chemicals or abrasives for cleaning. Also, do not pour boiling water into a bathtub with such a coating. |

The average service life of enamel is about 5 years. Therefore, if this method was chosen, you should be prepared for the fact that after this period of time the enameling will have to be repeated.

Prices for bath enamel
bath enamel
Acrylic liner
This method of restoring bathtubs is actively used for cast iron products and is otherwise called “bath in bath.” A custom-made or purchased ready-made acrylic liner is inserted inside the old structure, which follows the contours of the plumbing structure. It is fixed inside with foam or special mastic, which is applied to the inner surface of the bathtub. In this case, it is necessary to dismantle the plumbing parts for drainage.

Advice! For high-quality adhesion of the adhesive substance to the surface of the bathtub, it is best to clean and degrease it (the surface).
The acrylic liner is solid, so first it is inserted into the bathtub without glue, holes for drainage are marked, after which they are removed and these holes are cut. Then, after applying adhesive composition on the inner surface of the bathtub itself, lower the liner there and glue it.

Table. Advantages and disadvantages of the method.
| Advantages | Flaws |
|---|---|
| Acrylic is a very durable substance; such a bathtub coating will be stronger than enamel. | The need to dismantle plumbing equipment. |
| The liner does an excellent job of hiding all the unevenness and damage to the bathtub, making it smooth and beautiful. | Cannot be installed on structures made of thin metal. Such metal can bend under the weight of water and people, which is why the adhesive adhesion of the liner to the surface is easily broken. |
| Acrylic does not turn yellow over time. | Quite a high price. |
| Easy to install. | The method has high requirements for the quality of materials - poor glue or a low-quality liner can ruin the entire work. |
The service life of the acrylic liner is approximately 15 years. However, this restoration method is much more expensive than the previous one.

Video - Installation of acrylic liner
Acrylic coating
This method is otherwise called “fill bath” because it is performed using a special technology using liquid acrylic. The substance is poured onto the prepared surface old bath. This is a fairly durable coating that resists daily exposure well, but still requires careful cleaning without the use of abrasives.

On a note! Due to its relative thickness and viscosity, liquid acrylic can be used to mask unevenness during bathtub restoration.
The “fill-in bathtub” is a fairly new restoration method, but it has already become a favorite of many, since it does not force plumbing owners to completely replace the cast-iron bathtub, but can be done easily even with their own hands.

Filling bath - before and after
The advantages of the method lie in the durability of the coating, since acrylic is applied in a fairly thick layer - about 5-6 mm. By the way, despite its thickness, it spreads well over the surface of the bath. It is also very pleasant to the touch and smooth.

How to properly restore a bathtub using this method? It's simple - follow our instructions.
Step 1. First you need to prepare the bath for work. Using a grinding machine, the old enamel coating is sanded to a rough state.

Step 2. The bathtub is cleaned with a powder and a sponge, and then rinsed with clean water.

Step 3. Drain system can be dismantled both at the top and at the bottom of the bath.


Step 4. The surface of the bathtub is degreased using any degreaser. Acetone will do, as will any other solvent. After this, liquid acrylic is prepared according to the instructions indicated on the package. The mixture must be stirred very thoroughly.

Step 5. It's time to start filling the bath. For ease of work, a little acrylic can be poured into a small container. To avoid staining the floors, the container is placed in the bathtub.

Step 6 Acrylic is poured onto the surface of the bathtub in a thin stream, starting from the corners and edges of the bathtub in a circle.

Step 7 The substance is poured in several layers. It should flow down the walls of the bathtub, evenly covering the sides and top.

Step 8 Using a spatula, the acrylic layer is leveled, starting from the middle of the bathtub to its bottom. All “gaps” are covered. The acrylic is lifted with a spatula from the bottom of the bath. This way everything is processed side walls and bottom.
Step 9 The bath is left to dry - this period is at least 36 hours. All this time it is better not to touch it at all, otherwise you can ruin all the work.

Step 10 Lastly, when the acrylic dries, a drain system is installed.

Now you can use the product for your pleasure. The service life of a “fill-in bath” varies from 8 to 15 years.
Video – “Floating Bath” Technique
Compositions for “fill bath”
A “fill bath” can be made using two types of media – glass acrylic and liquid acrylic. They are different from each other, and a common mistake for beginners is to mistake them for the same substance.
Stakryl began to be used about 10-15 years ago. It is relatively inexpensive and has enough high strength. After applying it to the bath, it should be dried for at least 4 days - and already here you can see a clear difference between the substance and ordinary liquid acrylic, which has a shorter drying time. Glasscryl is also resistant to mechanical damage, so it is important to handle a bathtub covered with it with care and precision.

Liquid acrylic, on the contrary, has appeared quite recently on the construction products market. It has higher strength and resistance to various mechanical influences. The coating made from it retains a glossy shine for long period time. By the way, the smell from it is much less pungent than from glass. Acrylic takes only 36 hours to dry.

In general, both materials can be used for the restoration of bathtubs and other plumbing fixtures. But you should definitely know the difference between them.
Summing up what has been said, we can confidently note that restoring a bathtub with your own hands will restore its former grandeur and neatness. appearance It’s entirely within the capabilities of anyone without the need for drastic measures to replace the bathtub itself. But the service life of such updated products (or rather, their coating), of course, is not so long.
Acrylic bath liner - installation steps
Filling bath - before and after
Any, even the most reliable and high-quality bathtub, over time can become covered with cracks and roughness, turn yellow or rust. It is almost impossible to avoid this - even the mildest detergents and household chemicals lead to thinning and wear of the surface coating. In this case, the bath owner is faced with the question of purchasing and installing a new bowl. However, this is a rather expensive solution, which, moreover, entails the need for repairs to the premises. Therefore, it is better to restore the bathtub - it will not require large expenses, and the work can be done independently.
There are three main methods that allow you to restore the appearance of old plumbing: applying a new enamel coating, restoration with self-leveling acrylic and using a special liner. It is better to choose a specific method taking into account your own financial capabilities, the materials from which the bowl is made, as well as its condition.
In addition, it should be taken into account that such a solution has a number of disadvantages, since a bowl with a new coating will not have such performance characteristics, like one that was manufactured in an industrial setting.
- The materials that are used to restore plumbing fixtures are less durable and not as strong, so the surface requires more careful and gentle care.
- When enameling a bathtub or restoring it using liquid acrylic, you may encounter the following problem: the original color of the bowl will shine through the new coating (especially if the layer is too thin), changing its shade.
- During use and cleaning, the color of the bathtub may change under the influence of chemicals.
- Sharp or bulky objects will damage the new coating even if they fall from a small height, and dyes (such as hair dyes) can leave permanent stains.
- Those who like to smoke in the bathroom will have to give up their habit, as a cigarette can leave an unsightly burn on the surface.
However, restored plumbing fixtures are repairable, and their properties directly depend on the quality of materials and the accuracy of the work.
Despite the growing popularity of modern polymer compositions, steel and cast iron plumbing fixtures with enamel coating are often found in modern houses and apartments. The metal is strong and reliable material, but the enamel coating wears out quite quickly. Restoring an enamel coating is a fairly simple process that does not require special knowledge or skills.
True, this method of restoring the appearance of bathtubs has one significant drawback. Cracks that appear on the surface grow very quickly, the enamel begins to peel off, water accumulates underneath it, which leads to the appearance of an unpleasant odor, dampness and mold. In addition, this method is not suitable for baths with big amount minor defects - they can be noticeable even after coating.
How to choose a composition for restoring enamel?
In order for the new coating to be strong and reliable, you need to choose a composition for restoring bathtubs. There are not many options, so to make the right choice you need to know the basic characteristics and properties of the compositions.
| Name | Manufacturer | Durability of coating | Features of work |
|---|---|---|---|
| Russia, Germany | On average 5 years (subject to the conditions of application and operation, the figure can reach 7-9 years) | A two-component enamel with a hardener that hardens completely in 48 hours. Fills all minor defects of the bathtub surface well. It is quite difficult to work with the solution, since it is very thick and “sets” in about 60 minutes | |
| Russia | 6-8 years | Two-component solution with epoxy resin. It can be used when there are no noticeable defects or damage to the bathroom. Requires quick work as it hardens in about 70 minutes. In liquid form it is toxic and can cause allergies | |
| Tikkurila Company (Russia, Finland) | 10-15 years | One of the highest quality, but most expensive compounds for restoring plumbing fixtures. Working with the solution is quite simple, but the bath will be able to be used for its intended purpose in at least a week | |
| Random House Company, Russia | 6-8 years | Bathtub restoration kits, which include a two-component bowl coating, hardener and surface preparation products |
reflex 50
Step-by-step instructions for restoring a bathtub with enamel
Stage one. Preparation of available tools and materials
To enamel baths you will need the following tools:

The enamel that will be used to restore the bathtub must come complete with all the necessary components. To give the coating the desired shade, you can purchase a special tinting paste (unless prohibited by the manufacturer). In addition, it is very important to protect your mouth and nose with a respirator, your hands with gloves, and carry out all work only in a well-ventilated or ventilated area.
Stage two. Preparation for applying enamel coating
Before you start enameling the bowl, you need to thoroughly clean the surface, since the quality and aesthetic appearance of the coating depends on this.
| Step, no. | Description |
|---|---|
| Sprinkle the bathtub with an abrasive agent and clean it with coarse sandpaper. You can also use the grinding attachment of an electric drill, and also remove old enamel by sandblasting or hydrochloric acid, diluted with water in a ratio of 1 to 4. | |
| Treat areas with rust stains with a rust converter, wait 30 minutes and sand well. If there are deep cracks or chips on the surface, it is better to use automotive putty - there is a risk that the composition will not be able to fill them, and the enamel layer will turn out uneven | |
| Remove any remaining old coating and wipe the bath well using a rag or lint-free cloth. | |
| Fill the cup hot water, leave it for 10 minutes to warm up the surface, drain the liquid and dry the surface. Make sure there are no crumbs, lint or debris left on the bathtub. |
The preparation of the bath must be done in exactly this sequence, without skipping a single step, otherwise the enamel will quickly come off. The cleanest, smoothest surface of the bathtub is the key to ensuring that the new coating will be durable and reliable.
Stage three. Application of enamel coating
Combine all enamel components as indicated in the instructions, mix the composition well. Divide it into two parts - for the basic and finishing coating. Apply the first layer with a wide brush - it should be thin, but as even as possible, without changes. It is better to start from the edges of the bowl, gradually moving down. The composition must be spread very well so that it fills all the pores of the material. After applying the first layer, you need to leave it for 10-15 minutes, but you should not wait for it to dry completely, otherwise the enamel may become dusty, and then the work will be ruined. Next, apply a second layer with the same brush, the direction of the strokes is from the middle to the edges. Leave the bath for another 15 minutes and eliminate defects (even experienced craftsmen), using the brush in exactly the same way. You can perform this procedure until the enamel becomes too viscous.
Sometimes containers with a spray bottle are used to apply the mixture, but experts recommend avoiding this method, as bubbles and streaks may appear on the surface, causing the enamel to peel off. Instead of a spray bottle, it is better to use a compressor - it will allow you to evenly distribute the composition over the walls of the bath and create a coating of the same thickness.
It is better not to use the bath for a week - this is exactly how long it takes for the enamel to completely harden. The room temperature should be maintained at 23 degrees.
Video - restoration of a bathtub using the enameling method
Method number 2. Filling bath
This method of restoring plumbing consists of the following: liquid acrylic is poured into a bowl, which subsequently hardens and forms a new coating. Compared to surface enameling, which is described above, it has a number of advantages.
- Acrylic is a thick and viscous substance, thanks to which it lays on the surface in a thick, even layer, hiding all the defects and unevenness of the bathtub.
- The composition does not leave smudges, streaks or bubbles on the surface.
- To restore the bathtub, you do not need to remove the tiles or dismantle the bowl.
- The process takes less time than enameling or restoration using an inlay.
- Acrylic creates a film on the surface that repels dirt and plaque.
- Applying the mixture does not require special knowledge and skills.
- Most materials used for bathtub restoration have virtually no unpleasant odor.
The result of this restoration method will be a smooth, glossy surface that perfectly retains heat and does not retain dirt. As with enameling a bathtub, before you begin, you need to think about the choice of material. It is important to note that neither for the sake of economy nor for any other purpose can you use ordinary acrylic, which is sold in construction stores. Its characteristics differ from sanitary acrylic, which is used specifically for the restoration of plumbing fixtures, so you can completely ruin your bathtub and harm your health. The choice in this case is made between glass and liquid acrylic.
Glass or liquid acrylic?
Today, two types of materials are used for the restoration of bathtubs: glass acrylic and poured acrylic (the market leader in the production of such materials is the Plastall company, which is why liquid acrylic is often called plastol). Many consumers believe that they are no different from each other, but in fact this is not the case.
Stakryl appeared in stores about 10 years ago and has already proven itself well. It fits well on any surface and is cheaper than plastol, however, restoring bathtubs with its help can be quite difficult for beginners, since the composition sets quite quickly. Working with plastol is much easier, since it is less demanding to use and does not have a pungent odor. In addition, this material retains its properties even after freezing.
The Plastall company offers consumers who want to restore their bathtubs themselves a whole line of materials.
| Name | Drying time | Peculiarities |
|---|---|---|
| "Plastol" classic | 36-48 hours | An easy-to-work material that spreads well, has increased ductility and good adhesion. It has no pungent odor, does not require the addition of thinners or other substances, and forms a smooth and fade-resistant film. The mixture retains its properties for 90 minutes |
| "Plastol-24" | 24 hours | A new material based on an improved classic formula. Applied in one layer, the surface does not turn yellow, does not crack or peel, and is resistant to mechanical damage and abrasion |
| "Plastol-M" | 36-48 hours | A budget solution with an optimized formula, so the result of using the material is no different from restoring bathtubs using more expensive products. Does not have a strong odor, does not cause allergies, the mixture retains its characteristics for 90 minutes |
| "Plastol-Super" | 16 hours | The “fastest” liquid acrylic that hardens in a matter of hours. Does not form bubbles or streaks, does not require the addition of solvents or other components, but the mixture is “viable” for only 45 minutes |
When choosing a material, it is important to pay attention to the price - a good product cannot cost less than what is indicated on the manufacturer’s website, and counterfeits do not provide required quality finished coating. For those who do not yet have experience in restoring bathtubs, it is recommended to buy acrylic with a reserve so that it is enough to cover the entire surface.
Step-by-step instructions for restoring bathtubs with self-leveling acrylic
Stage one. Preparing to pour acrylic
Surface preparation for restoration is practically no different from preparatory stage when enameling a bathtub. You need to clean off the old coating and sand the bowl so that its surface becomes matte, warm it up and dry it. After this, you need to disconnect the siphon designed for draining water and place a container under the bathtub into which excess acrylic will drain (the material must be avoided getting into the sewer - this can lead to serious problems with water drainage).
Stage two. Filling a bathtub with acrylic
Prepare the mixture as indicated in the instructions, pour it into a convenient container and place a rubber spatula nearby. If you need a material of a specific color, you can use a tinting paste, but first make sure that this is allowed by the manufacturer. Its amount should not exceed 3% of the total volume of acrylic.
Take a container with acrylic and pour the composition in a thin stream onto the sides of the bowl, pushing it with a spatula under the edges of the tile. There is no need to pour too quickly and forcefully - you need to act so that you get a layer 4-6 mm thick, and the material slowly flows down to about the middle.
Move the container evenly around the perimeter of the bowl, without taking long breaks, until the circle is closed.
Move the jet closer to the middle of the bath and do the same to cover the entire surface. You should not try to smooth out streaks or unevenness - this will only worsen the situation, and all defects will disappear during the drying process. The time for complete hardening of the acrylic is indicated in the instructions, but it is better not to use the bathtub for three days.
During the entire period while the material dries, it is better not to touch the bathtub or even get close to it, since the entry of the slightest particles of dust or debris can spoil the appearance of the restored plumbing fixtures.
Video - Instructions for restoring bathtubs with Stakryl
Method No. 3. Restoration using an inlay
Restoring bathtubs using acrylic liners is also called the “bath-to-bath” method. The liner is a structure made of acrylic, plastic or silicone, which is an exact copy of the bowl. You can buy it in a specialized store, having previously taken all the necessary measurements of the bathtub, and then glued it to the old bowl.
The most popular today are acrylic inserts - they are much more aesthetically pleasing and durable than plastic or silicone ones. This design is ideal for old bathtubs that cannot be restored with a new layer of enamel or liquid acrylic. In addition, the surface of the liners retains heat perfectly, its surface is absolutely smooth, but at the same time does not slip at all.
This is the most reliable way to restore a bathtub (the service life of a high-quality acrylic liner is approximately 15-20 years) and, contrary to popular belief, it does not reduce inner space bathroom
However, this method of bathtub restoration also has its drawbacks.
- Difficult to install. Installation of an acrylic liner is a rather complex and time-consuming process. The liner is placed so that it covers the edges of the bathtub, and if the bowl is installed close to the wall, you will have to additionally remove the side and break the tiles.
- Possibility of water getting between two baths. If the installation was performed incorrectly, or due to wear and tear or the use of poor-quality materials, water may get between the liner and the bottom of the bowl. This will lead to dampness, mold and an unpleasant odor.
- Inconveniences during operation. Sometimes manufacturers make liners that are too thin, which is why they can sag underfoot and eventually become deformed or burst.
- Inserts are made for standard bathtubs only. As a rule, bathtubs are divided into two types - 1.5 m and 1.7 m, and if the bowl has non-standard sizes or shape, choosing an insert will be very difficult, and sometimes impossible.
- Quite a high cost. Compared to new acrylic bathtubs, liners are inexpensive, but for the same price you can buy a new steel bathtub.
How to choose an insert?
To avoid making mistakes when purchasing an insert, you need to take the following measurements:
- the width of the bowl along the inner surface, and measurements should be taken on both sides;
- length along the inner and outer surfaces;
- depth of the bowl at the drainage point.
To avoid making a mistake that will entail hassle and additional costs, you can invite a professional measurer.
How to choose a bath liner
It should be noted that most modern stores sell products with a thickness of 3 and sometimes 2 mm - such liners are very short-lived, and it is not recommended to use them for the restoration of bathtubs. IN best case scenario the structure will last about 5 years, after which it will have to be dismantled and replaced.
Step-by-step instructions for restoring a bathtub with a liner
Stage one. Preparing the bath and available products
To install acrylic liners, polyurethane foam and silicone sealant. It should be noted that to perform the work you need to use only tools specifically designed for these purposes. Plain foam, which is used in repair work, will not work in this case - it has a low density and expands too much. To improve these characteristics, additional components are added to the foam - this is the material used for installing acrylic liners. In addition, in this case it applies plumbing sealant, which is waterproof and mildew resistant.
Preparing a bathtub for restoration with a liner– a rather long and labor-intensive process, which, in the absence of appropriate skills, is best left to specialists.
Stage two. Installing the liner
The basic rule that should be remembered when installing an acrylic liner is that all work should be done quickly enough (in about 4-5 minutes), otherwise the adhesive will harden and will not “grab” the materials well.
| Step, no. | Description |
|---|---|
| Apply to the bottom and sides of the bathtub polyurethane foam. Its quantity also depends on the tightness of the structure, but usually it is applied in stripes with an interval of 4-5 cm, and on the sides the stripes should be vertical and stretch from the bottom to the very top | |
| Install liner | |
| It’s good to press down the sides of the liner with your hands, then stand with your bare feet in the place where the drain is located and move towards the opposite edge - this way the liner will fall into place and press firmly against the surface of the bowl. After this, press down the walls of the structure well with your hands. It is not recommended to put pressure on the liner with any hard objects or hit it, otherwise you can damage the acrylic during the installation process |
The unpresentability of old plumbing is not a reason to replace it. There are several effective and inexpensive methods for enamel restoration. In order for the updated “jacuzzi” to serve for several more years, it is necessary to adhere to the restoration technology and follow the basic recommendations for caring for the bathtub coating.
Restoring an old bath: choosing a method
A new snow-white bathtub loses its attractiveness over time - the surface becomes rough, the gloss disappears, yellowness and smudges appear. There is a need to replace plumbing fixtures. However, complete renovation and purchase new bath- a costly event. It is much easier to restore the coating of steel or cast iron yourself.
The three most popular methods for renovating an old bathroom are:
- two-component enamel treatment;
- “fill-in bathtub” made of acrylic;
- installation of the liner.
Each method has its own characteristics.
Bathtub enamel - affordable option restorations, effectively eliminating roughness, yellowness, rust and minor scratches. Enamel will not be suitable if there are large defects: peeling of the coating, chips and deep scratches.

The main advantages of covering an old bathtub with enamel include:
- low cost;
- the enamel layer does not hide the volume of the bathtub;
- To carry out restoration, it is not necessary to dismantle the siphon and tiles along the sides of the bowl.
Disadvantages of the method:
- If the enamel is applied poorly, brush marks may remain;
- drying time - 3-4 days;
- does not mask major damage;
- coating service life is up to 5 years.
Self-leveling acrylic applied to the walls without a brush by evenly dripping. Using liquid acrylic has a number of advantages:
- the updated bathtub will not turn yellow over time;
- coating is resistant to household chemicals and the formation of corrosion;
- the material is suitable for the restoration of various bathtubs;
- no smudges form on the surface;
- restoration does not require dismantling the old bathtub;
- acrylic does not allow air to pass through, so the coating is smooth without air bubbles;
- long service life - about 15 years;
- acrylic coating resistant to mechanical damage and chips;
- The high thermal insulation of acrylic retains heat and the water does not cool down quickly.

Arguments against the “fill bath”:
- Before processing, you will need to dismantle the drain;
- acrylic repeats the factory irregularities of the bowl;
- the coating does not tolerate very high temperatures;
- long drying period - 4 days.
Important! If you use low-quality glass and do not follow the finishing technology, bubbles may form, which will subsequently lead to deformation of the new coating.
Installing an acrylic liner into an old-style bathtub - the most expensive method of restoration. As a rule, the insert is made to order according to the plumbing parameters. It is not advisable to carry out this restoration method yourself - installation errors reduce the service life and ease of use of the bathtub.
Advantages of a “bath in a bath”:
- quick installation;
- the ability to hide chips and other defects;
- The liner has all the positive characteristics of acrylic: smoothness of the coating, heat capacity, ease of maintenance.

Disadvantages of this recovery method:
- high cost of the liner;
- before restoration old bath, you will need to remove the tiles adjacent to the plumbing;
- reducing the useful volume of the bowl;
- Difficulty doing the work yourself.
Step-by-Step Guide to Enameling a Bathtub
High-quality enamel is the basis for the durability of the bathtub
Particular attention should be paid to the choice of enamel. Experts recommend using specially developed products:

Required tools and materials
To carry out restoration work, you should prepare:
- electric drill and attachment (brush) for cleaning old coating;
- abrasive;
- oxalic acid;
- two-component enamel;
- surface degreasing agent;
- a brush for applying enamel with a width of 7 cm - it is better to choose a medium-hard tool with natural bristles;
- respirator or gas mask;
- masking tape, polyethylene;
- cleaning powder.
Surface preparation
Before you restore an old bathtub at home, you need to remove the old coating:

Procedure for treating a bathtub with enamel
After degreasing the bath, you can begin applying enamel. The work can be roughly divided into several stages.

As a rule, to achieve a lasting result you need to apply 3-4 layers. Installation of the piping and operation of the bath is possible in 4-5 days.
Important! It is advisable to carry out restoration in the warm, dry season. During the drying period, the windows must be opened. There should be no children or pets in the room.
How to update a bathtub with acrylic
The technology for restoring bathrooms with glass acrylic is in many ways similar to enamel processing. Surface preparation occurs in the same way as in the previous method. Next you will need to dilute the liquid acrylic:
- Add hardener to the acrylic container and mix well.
- Leave the mixture for 10 minutes and mix again.
After cleaning the bathtub and preparing the glass, the plumbing is restored:

The drying time of glass depends on the composition of the material and the air temperature in the room.
Installing an insert is the fastest way to restore
If there is significant damage, re-enamelling or acrylic treatment may not give the expected result. To avoid having to remove the old bathtub, the restoration will have to be done using a liner.
To select a ready-made or order a pallet, you need to take five measurements correctly:
- full length - the distance between the edges of the sides of the bathtub;
- internal length - maximum length inside the bowl;
- the width of the container near the drain;
- the width of the bathtub in the back area;
- bathtub depth - to calculate above the drain, place a level bar across the bowl and measure the distance to the bottom.

Installation procedure:

Important! Installation of plumbing fittings must be done very carefully. An overtightened tightening bolt can cause a crack in the liner, and the accumulation of water between the coatings is a consequence of insufficiently strong fasteners.
When performing a comprehensive restoration of plumbing, it is advisable to replace the legs of the old bathtub. Ready kit You can purchase it in a store or make a support from metal profiles yourself.
Correction of minor bathtub defects
Single defects in the bathtub can be locally masked without resorting to a complete restoration of the plumbing. Recommendations from specialists will help restore damaged areas in a short time.
Through holes. You can fill such a crack with epoxy resin, and apply a reinforcing mixture on top. To restore the bathtub you will need a special repair kit.
Chips and scratches. Procedure for eliminating the defect:

- Treat the area with a rust converter, then clean the surface with powder.
- Degrease the surface with acetone.
- Coat the chip with car putty and sand it.
- Paint the area with paint.
Cleaning the bathtub without damaging the coating
Careful treatment and regular cleaning of the bathtub cover will help maintain the aesthetics and attractive appearance of the plumbing fixtures. Just follow these simple tips:
- Enamel and acrylic coating are susceptible to abrasive substances, so you need to choose a “mild” cleaning agent. It is important to exclude detergents that contain ammonia, powder, chlorine, acetone and other aggressive components.
- After cleaning, the surface should be rinsed with plenty of water.
- It is not advisable to bathe pets in the bathtub - sharp claws can leave visible scratches. Metal basins and buckets cannot be placed in the bowl.
- A dangerous enemy of acrylic is rust on the faucet and metal elements of plumbing fixtures. The acrylic surface absorbs yellowness, which is subsequently very difficult to remove. Therefore, you should not allow limescale to form and wipe the plumbing fixtures dry more often. Water should not drip from the tap - the drain hole will quickly begin to rust.

Complete restoration of the bathtub - enough difficult process, requiring certain skills from the performer. In the absence of experience, the likelihood of errors is high. It is better for novice craftsmen to use the poured acrylic method for restoration.
Replacing a bathtub can easily be called the most problematic stage of “secondary renovation”. As a rule, it is associated not only with dismantling and plumbing work, but also with partial disruption of the tiles laid both on the walls and on the floor. Fortunately, modern construction technologies allow you to significantly simplify this process, namely, to do the restoration of the bathtub yourself. One of the most popular methods is the use of liquid acrylic. We will talk about it in this article.
Is it necessary to restore the bathtub?
Before moving directly to the consideration of the relevant technology, let's figure out whether it makes sense to restore the bathtub, and whether it would be easier to replace it with a new one.
Restoration of bathtubs in general and with self-leveling acrylic in particular has a number of undeniable advantages. Firstly, there is no need to disturb the existing renovation, be it tiles or wallpaper. This not only greatly simplifies the process, but also makes it possible to significantly save on restoring the finishing of the bathroom. Secondly, restoration of even the most “dead” bathtub will cost much less than replacing it, even for the most cheap analogue
. And finally, restoration will take much less time than replacement, since the procedure does not require shutting off the water and other “plumbing complications.”
Liquid acrylic allows you to save even the most “dead” bathtub
Advantages and disadvantages of liquid acrylic
One of the most common methods of restoring bathtubs is restoration with liquid acrylic.
The material is a two-component liquid, which, when mixed, hardens, forming a solid surface that perfectly hides any defects in the old bathtub.
Liquid acrylic is supplied in the form of two separate containers with base material and hardener
- Compared to other restoration materials, liquid acrylic has several advantages:
- Allows you to hide both small and large defects. Resistant to damage and dirt. At proper care acrylic bathtub
- can maintain an attractive appearance for 10-15 years.

- Increases the heat and sound insulation of the bath. Water in a bathtub coated with liquid acrylic takes much longer to cool down than in a steel or cast iron counterpart.
Although it is worth clarifying that with all the listed advantages, liquid acrylic also has a number of disadvantages. It dries for quite a long time (from 24 to 48 hours), has a specific odor during application and is very susceptible to contamination during the drying stage, so when carrying out work it is necessary to protect the bathtub as thoroughly as possible from dust and dirt getting into it.
However, all these shortcomings are more than compensated by the advantages of this material, so we can safely say: restoration of bathtubs with liquid acrylic takes first place among similar methods in terms of price-quality.
Preparation for the process
Let's look at the entire process of restoring a bathtub with liquid acrylic. First, let's look at the "source material". It is precisely this seemingly irretrievably damaged bathtub that we will try to restore.
Self-leveling acrylic will cope even with such a bathroom
The technology for restoration with liquid acrylic is not very complicated, however, for everything to be successful, the bathtub must be properly prepared.
First of all, the surface is treated with some abrasive agent. A grinder with a grinding attachment is best suited for this purpose.
It is best to clean the surface using a grinder
This, firstly, will remove remaining contaminants from the surface of the bathtub, and secondly, it will make its surface rougher, which will make it much easier for the acrylic to “grab.”
After the bath has been treated, the remaining dust and dirt are removed from its surface, it is thoroughly washed and degreased with any available means (for example, ordinary acetone is quite suitable for this purpose).
At this point, the process of preparing for applying acrylic can be considered complete.
Replacing the old drain and overflow will give the restored bath a completely fresh look
Ideally, before applying liquid acrylic to the bathtub, you should remove the old drain and overflow, and after restoration, replace them with new ones. But since this does not affect the restoration process itself, in order to save money, this stage can be skipped.
Step-by-step instruction
- The first step is to mix the acrylic with the hardener and let it sit for 15-20 minutes to begin the necessary chemical reactions.
To avoid acrylic and hardener must be mixed very carefully
Please note that this must be done immediately before starting work, since otherwise the acrylic will thicken and become unsuitable for pouring.
- A little diluted acrylic is poured directly onto the bottom of the bathtub and, using a special plastic spatula, they begin to “lay” it on the sides, allowing the remaining material to flow freely into the bathtub.
To apply acrylic, it is best to use a plastic spatula.
- When the sides are completely covered with a layer of acrylic, the material continues to be applied to the middle part of the walls of the bathtub.
Acrylic is applied from top to bottom until all sides of the bathtub are covered with it.
If small smudges form during the draining process, they can be smoothed out with the same plastic spatula.
- When the entire bathtub, including the bottom, is covered with a layer of acrylic, all that remains is to slightly smooth out the smudges and the filling work can be considered complete.
After a couple of hours, the old bathtub is almost unrecognizable!
Now you need to wait for the acrylic to dry completely - as a rule, this takes from 24 to 48 hours, depending on the brand of material, install a new drain and overflow (if, of course, you removed the old ones), and at this point the restoration work can be considered complete.
Video: restoration of a bathtub using the pouring method
Possible mistakes
Although the filling procedure is quite simple, errors still occur during its implementation that can negatively affect the final result.
- Poor bath preparation. If the surface of the bathtub has not been properly cleaned and there are areas of rust, dirt or grease left on it, then in the future this may lead to peeling of the acrylic in these places. The same applies to a poorly dried bathtub.
- Incorrect mixing of components. If the components of liquid acrylic are mixed poorly, or if the mixture is used after the recommended period, drips and bulges may form on the surface of the bathtub, which will be very difficult to remove.
- Work is carried out in an unsuitable environment temperature conditions. It is recommended to fill at a temperature of 16 to 25 °C. A significant deviation from these indicators may adversely affect the final result.
Well, as, in fact, when carrying out any work, during the restoration of the bathtub you should not rush, but do everything, as they say, “with feeling, with sense, with arrangement.” And then the process of restoring the bathtub with liquid acrylic will go without problems.
Proper care
As we have already said, acrylic can retain its original attractive appearance for more than ten years. However, for this you need to properly care for it. Do not wash the acrylic surface with detergents containing an abrasive component. This also applies to rags and washcloths that you will use to wipe the bathtub. For washing acrylic, the usual liquid detergent that you use for dishes is perfect, although special “cleaners” can also purchase special preparations for caring for liquid acrylic.
Exist special means on the care of acrylic, but in their absence you can get by with ordinary dishwashing detergents
And also, if you are going to swim in acrylic bath large pets, it is worth purchasing a special rubber mat that will protect the acrylic surface from their claws.
As you can see, restoring a bathtub with liquid acrylic is a fairly simple procedure and does not require serious expenses. We are sure that thanks to our advice you will easily cope with it. Good luck with your renovation!
Born in 1977 in Donetsk, Ukraine. Graduated from the Donetsk Polytechnic Institute (now Donetsk State Technical University) with a degree in Automated Control Systems. Worked at the Donetsk Metallurgical Plant. In 1997 he moved to Moscow, where for 8 years he worked in several construction teams.
All cast iron bathtubs become less than aesthetically pleasing over time. The enamel that was initially applied by the manufacturer begins to darken and crack, and the rust that has appeared cannot be washed off. Certainly, this problem can be solved by purchasing a new container. But there is a second option - restoration, which includes a set of certain measures that allow you to update the bathroom, hide existing damage, prevent new ones and extend the service life of the restored item as long as possible.
How to profitably restore an old worn-out bathtub with your own hands at home
The first thing that comes to mind when seeing an old bathtub is replacing it with new equipment, but such a decision entails large financial costs. Delivery and installation must be taken into account in the cost.. You may also need partial replacement floor, which will be damaged when dismantling the old bathtub.
A cheaper option is to restore the container, for which you will only need to buy finishing material. To save money, you can do all the work yourself without hiring a specialist. The main thing is to understand the causes of damage and strictly follow all restoration rules.
Damage to the surface of a cast iron bathtub occurs due to the fact that the enamel applied initially wears away over time. Reducing the layer thickness leads to the appearance of cracks, which are easily susceptible to corrosion and contamination.
But such a nuisance does not at all spoil the main operational functions of the equipment itself, which means the problem lies only in the enamel coating, which can easily be replaced with a new one:
- cover the surface of the bathtub with acrylic;
- apply new enamel to the surface;
- install the liner.
To achieve a good result, it is not enough to simply paint the bathtub or install it. All work will be reduced to zero results if the surface is not properly prepared for subsequent restoration.
How to update and restore - preparing a cast iron bathtub for renovation

Although the methods for renovating an old bathtub are different, they all require the same preparatory stage. Complex work there is no preparation, but the entire subsequent result depends on the correctness of their implementation. How to repair - steps:
- First of all, the bathtub must be degreased and washed as best as possible. The presence of fat can create big problems in the future. Its presence minimizes the adhesion of all materials. The photo on the right shows the process.
The new coating, which at first glance adheres well to the base, will again become unusable in a short time. The cleaning process is meticulous and lengthy, which involves the use of potent chemicals containing acid.
All subsequent stages of bathtub restoration are carried out only after the surface has completely dried.
- After removing grease and dirt, it begins mechanical grinding the entire inner surface. This is done in order to make it as rough as possible, which will make it possible to increase adhesion. Grinding is carried out using a special attachment on a drill (a brush with metal bristles).
These brushes are commercially available in two versions, hard and soft. To clean the surface more carefully, it is better to use a soft option. Sandpaper is also suitable for cleaning. Particular attention should be paid to places where rust appears; they will have to be cleaned down to the metal base.
- After all the work the bathroom is cleaned again to remove remaining debris and grease. You can also check the final result for existing fat using water. If the water flows in streams without forming droplets, it means that all the work was carried out correctly.
- The container is disconnected from the sewer hole. This is done to avoid clogging the siphon with acrylic or enamel.
After cleaning, it is better to treat rust with your own hands with a converter to reduce the risk of its manifestation.
How to cover a bathroom with acrylic, repair it and polish it

The whole process consists of gradually filling the surface with a liquid solution (acrylic). Due to its thickness, the layer is applied about 4 mm along the edges and 6 mm at the bottom of the container. This allows the new coating to last as long as possible (up to 10 years of operation).
The thick composition not only paints over damage to the surface, but it can also be used to polish the surface. Another advantage of this method is:
- applying liquid acrylic is a simple and fast way;
- the solution has no bad smell, which means that it is not necessary to leave the apartment during the restoration work;
- no dismantling of the equipment is required; it is enough to place a container under the drain hole into which the residues will drain;
- In comparison with the use of enamel paint, acrylic dries 2 times faster (1-3 days).
The drying time of acrylic depends on the composition of the product. If it is possible not to use the bath for 3 days, then it is better to use the option with longer drying time.
This choice will contribute to a more uniform spreading of the thick mass, and in the future, greater service.
The process of working with acrylic step by step:
- the base is mixed with the hardener (instructions included);
- the resulting solution is first poured between the tile (wall) and the bathroom;
- the bath itself begins its renovation from the top;
- application of liquid continues along the entire perimeter;
- If bubbles form, very carefully remove them with a brush (the stripes resulting from the brush will disappear on their own as the acrylic dries).
The entire filling procedure takes place in one step. Extending the time for several hours will result in an uneven surface.
A new layer of enamel for renovation and restoration of the bathroom
The cheapest and oldest way to restore a bathtub at home is to apply a new layer of enamel paint to its surface.
When choosing this option, you need to purchase paint specifically for this job. It must be taken into account that this product is available in two forms and differs in its composition for professional and independent use:
- Paint for professional work, too liquid. Its use involves applying several layers, and this is a rather complicated procedure.
- Paint for self-application thicker and easier to apply.
How to properly restore and restore a bathroom - the process of painting it yourself:
- The enamel is mixed with a hardener (see instructions). To achieve a softer application, you can add solvent 646 to the composition. Its proportions are equal to 10 percent of the volume of the resulting solution.
- It is better to mix the composition twice, dividing everything into two parts. This technique will prevent the second portion from hardening while the main layer is being applied.
- Painting starts from the edges.
- Having carefully painted the top, we begin to go down with the brush. All movements are carried out from above towards the bottom.
- Particular attention is paid to the drainage area, where the paint is rubbed in more thoroughly.
- While the second portion of paint is diluted, the first will dry a little, which allows you to continue working. After applying the second layer, the remaining enamel is poured to the bottom, where it is evenly distributed.
- Until the enamel becomes viscous, all smudges can be removed with a light movement using a brush, but as soon as it begins to thicken, nothing can be corrected.
- You can use the finished equipment after a week.
Installing an acrylic liner
Installing a liner at home involves inserting an acrylic liner into the bathtub, and its dimensions must exactly match the old bathtub model.  This is the only way the method will be effective. After preliminary cleaning, the liner is fixed using special foam. Eventually:
- all defects are hidden;
- a strong cast iron base remains;
- service life increases by another 15 years;
- the resulting surface does not turn yellow over time.
The video shows in detail the process of restoring an old bathtub at home with your own hands:
When thinking about the method of restoring a cast-iron bathtub and calculating the budget, you need to understand that the less money invested in the process, the faster it will have to be repeated
It is better to leave the decision to specialists who will accurately determine the extent of damage and advise on the best suitable solution. These articles will tell you in detail about.


