How to dry winter garlic after harvesting. Garlic should be completely dried after digging in rainy weather.
Gardeners pay great attention to drying garlic after harvesting it from the garden, since only dried garlic according to all the rules will be stored for a long time. Contrary to all logic, well-dried and stored garlic is still considered not dry, but fresh. This vegetable is consumed during the winter, used in canning, added to various dishes. From it, zealous housewives prepare an aromatic spice - dried garlic. Let's find out how to properly dry it for the winter without losing a single milligram of healthy carbohydrates, essential oils and phytoncides, which this crop is rich in.
First of all, the garlic must be removed in time. The heads overexposed in the garden will begin to disintegrate into individual cloves and sprout. This garlic will not last long. In order not to be late with harvesting, the flower arrows on several plants are not broken off, but are left as guides. Optimal time To dig up a crop, the time is considered when the arrows are completely straightened and the shell begins to burst on some of them.
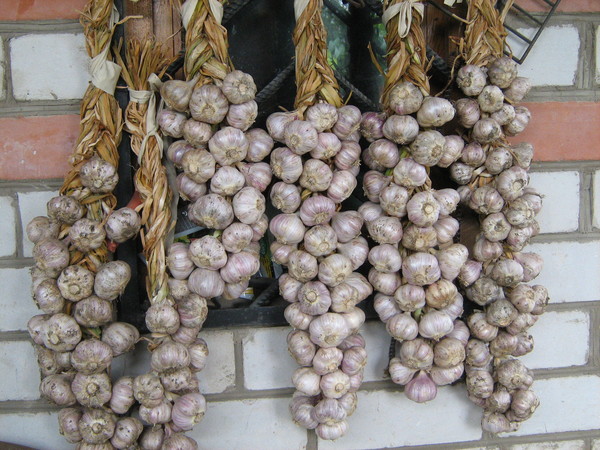
Carefully dig up the garlic, trying not to damage the heads, shake off the soil from the roots, lay it out on the garden bed and dry it for several hours in the sun. It is highly undesirable to wash the bulbs, since the gardener’s task during this period is to dry the vegetable as quickly as possible. In the evening, the dried heads are tied into bunches and hung for final drying in the shade under a canopy. The place should be well-ventilated, then the bulbs will dry faster and better. Drying time lasts from a week to a month depending on weather conditions.
Dried garlic is tied into braids or cut at a height of 4–8 cm from the root collar. The roots are cut off with a sharp pruner, then the heads are stored in a cool place. dry room with good ventilation.
Can it be dried in the sun?
This issue remains controversial among vegetable growers. Many of them notice that after prolonged drying under straight sun rays the garlic seems to be baked and is stored worse in the future. Some summer residents best place For drying garlic, use only well-lit sunlight.
The last option will certainly suit residents of northern regions with dim sun and cool weather. And in the southern regions it is better to shade this crop.
In any case, in the evening the bundles of garlic are removed under a canopy, since dew falls in the morning, which makes drying difficult.
How to prepare dried garlic for spice
Well-dried garlic has the following characteristics:
- the tops have turned yellow and dried out and make a rustling sound;
- the roots became thread-like;
- thin dry scales similar to tissue paper have formed on the heads.
- The weight of the dry product is reduced from the original by 40–60%.
In this form, the vegetable lasts well for several months. Before storing, the heads are inspected and those damaged during excavation, with a broken shell or signs of deterioration are set aside separately. Such specimens must be used up first - put into conservation, used for food, or dried again.
The teeth are first cleaned, damaged areas are cut out and crushed. In this form, garlic turns into an exquisite spice that does not lose its aroma for a long time and is ready to be added to various dishes - borscht, pilaf, salads, snacks.
There are many ways to get this spice. Let's look at the most popular of them.
Drying methods
Garlic, along with apples, pears, tomatoes and other fruits or vegetables, lends itself well to drying. Moreover, not everyone’s home conditions allow them to maintain beneficial features vegetable for a long time, so housewives prefer to dry it for the winter. In dry form, garlic reserves do not lose their aroma for a long time, do not require space in the refrigerator and are compactly stored.
How to dry indoors
Garlic for drying is peeled, washed, allowed to dry and cut into thin slices with a sharp knife. They are laid out on drying trays, which can be easily made from scrap materials as follows:
- cut four boards 10–15 cm wide;
- a box of arbitrary size and height is knocked together from boards;
- one side is covered with a thin mesh fabric that allows air to pass through well and does not absorb odors.

Garlic cut into slices is laid out on a cloth in one layer and placed in a shaded, ventilated place. To protect from dust and flying insects, the top of the box is covered with a second layer of fabric, placing the product between them. From time to time the plates are turned over, ensuring uniform evaporation of moisture from the surface.

When fully dried, garlic is brittle, breaks easily, and is cream to light brown in color. Some of the plates can be crushed with a blender and add a little table salt. The result is garlic salt, a popular spice, ready to use. Due to the salt, which absorbs excess moisture, this spice stays dry longer and does not spoil.
The finished product is poured into jars, covered with lids and stored in a dry, dark place. Dried garlic stocks should be inspected periodically. If the spice has caked and a musty smell appears, scatter it on a tray and lightly dry it in the oven at a temperature of +50°C.
In electric dryers or ovens
Garlic is dried in electric dryers in the same way. In them, the product dries much faster, since drying electrical appliances are equipped with light heating and forced ventilation. Under such conditions, the product is quickly and evenly brought to the desired condition.
In the absence of an electric dryer, garlic can be dried in the oven. The baking sheets are covered with baking paper and the chopped cloves are laid out on it. The product must be dried at a temperature not exceeding 40–60°C. With more high temperature the lobules darken, phytoncides are destroyed, and essential oils go rancid. As a result, the finished product has much worse taste properties, and its benefits are reduced.
![]()
How to keep garlic arrows fresh for the winter
Garlic lovers know well that not only the underground part of this plant is edible and useful, but also the stem and leaves. First of all, they use young shoots for food, which they break out in June. They also contain large quantity vitamin C and are extremely necessary at the beginning of summer. Some of the arrows can be prepared for the winter by any in a convenient way– freeze, dry or sprinkle with salt.
Young leaves are also suitable for harvesting greens. After cutting, they should be washed and yellowed and coarse feathers sorted. The rest are prepared together with the arrows.
For drying, washed and finely chopped greens are laid out in one layer on pallets and brought to a loose state. Dry for several days, depending on air humidity and temperature. Then they are crushed and poured into jars.
For freezing, the arrows are also washed in running water, dried on napkins, cut and placed in plastic bags or containers. IN freezer in this form the product is stored indefinitely.
A recipe with salt is suitable for storing in the refrigerator. The prepared arrows are placed in clean glass jars, interspersed with layers of salt, and sealed tightly.
If the room where dried garlic is stored is too humid and it is not possible to reduce it, it is better to put the finished spice in the freezer. Freezing will allow you to preserve your favorite seasoning for much longer. In this case, it is packaged in small portions, for “one time use”.
Drying is an environmentally friendly and labor-intensive way to preserve garlic for a long time. Subject to storage conditions, it does not lose its quality throughout the year and is convenient to use. Adding a small amount at the end of cooking will give the dish delicate aroma and protects against colds.
Garlic harvesting must be carried out competently and in a timely manner. After all, this process is decisive for the further storage of the bulbs, as well as the complete and correct completion of their growth process.
The most best time for harvesting garlic this warm days no rain. However, cleaning must be done correctly. The possibility of long-term storage directly depends on this. In order to determine when to harvest garlic, it is necessary to know the time of its planting and some signs indicating ripening.
How to determine whether the crop can be harvested
Signs for removing spring garlic are such characteristic external manifestations as:
- the initial stage of the tops adhering to the ground;
- leaves are yellow in color.
This happens mainly in the second half of August, closer to the beginning of autumn.
Winter garlic begins to be harvested in mid or late July. Most often on the 12th on the Feast of Peter and Paul. It is at this time that the bulbs reach the required mass.

Characteristic signs of ripening winter garlic are:
- acquisition lower leaves yellowish tint;
- cracking of the arrow (inflorescence);
- thinning the skin of the heads to a dry state.
The following signs indicate the timeliness of harvesting spring and winter garlic:
- dense head;
- the cloves are easily separated from each other;
- The film can be easily removed.

If the garlic is not ripe, it will be too soft. Overripe - completely unsuitable for long-term storage. It should also be taken into account that if the summer turns out to be rainy, the harvest time will be earlier.
Perfectly ripe summer and winter garlic has 3 scales. There are two ways to check this.
- Dig up a few heads and evaluate them.
- Rake off the soil from 2-3 bulbs and look at the condition of the scales.
How to clean properly
One to two weeks before harvesting, it is recommended to rake the soil away from the bulbs. This trick contributes to faster and better ripening of the bulbs. Before harvesting garlic, you must completely stop watering it and let the soil dry thoroughly.
Harvesting should not be extended over time. Cleaning must be done as quickly as possible. This should be done in dry weather in the morning or evening.

In order to achieve one hundred percent harvest of garlic and minimize damage to the bulbs, you need to know the technique of this process. It is quite simple, but it is more convenient if two people participate in the procedure.
- The arrows are cut off.
- A row of garlic is dug up with a garden fork or shovel pointed vertically into the ground, a few centimeters from the bulb.
- If the tops are strong, then you can gently pull them. If not, then you need to disassemble the soil with your hands (it is recommended to wear gloves for this).
- Bulbs should not be thrown into a pile as they may be damaged by impacts. They are neatly placed in one place.
- After part or all of the harvest has been harvested, the garlic is carefully sorted out. Remove the remaining soil from the heads, remove the top layers from the scales, clean the bottom and roots, and set aside the damaged bulbs.

However, the cleaning process does not end there. The garlic must be dried properly. This is done to ensure that it is as suitable for storage as possible.
How to dry garlic
If the weather permits - the days are sunny and hot, then you can do this outside. If it rains or the humidity is high, the crops are stored under sheds or in rooms with good ventilation. Some experts recommend drying garlic outside during the day and moving it indoors in the evening.
If harvesting was carried out in rainy weather, then the bulbs must be dried in special actively ventilated apparatus. This process takes about 10 days. The temperature in such dryers must be increased gradually. Starting at 25 degrees and going up to 40.

Garlic should be dried together with the tops, which cover the heads, to avoid sun burns. This allows you to further increase the mass of the bulbs and the nutritional quality of garlic. Indeed, during drying, part nutrients from the leaves passes into the heads. This process lasts about two weeks.
After the heads reach a condition suitable for sending the crop for storage, its roots and tops need to be trimmed. The stem is left at least 2 centimeters, but no more than 10 (although sometimes the tops are not cut off at all, and the garlic is then woven into braids).

After this, the bulbs must be sorted again:
- send beautiful and intact heads for long-term storage;
- Set aside damaged, rotten bulbs for use in the near future.
What are the consequences of untimely cleaning?
If garlic (both summer and winter) is not dug up on time, then the results of the delay will be quite disastrous for its appearance, taste qualities and opportunities long-term storage.
- The scales covering the bulbs will crack.
- The head will break up into individual cloves.
- Rooting of parts of the bulb and re-growth will occur.

Delay may even result in the crop becoming completely unsuitable for use. Therefore, experts advise gardeners to treat the process of harvesting garlic no less responsibly than planting, watering or caring for it during growth.
Compliance with the timing of harvesting winter and spring varieties, as well as their proper processing and drying, guarantees the possibility of long-term storage in winter, one hundred percent preservation of taste and nutritional qualities useful product, which has become an indispensable ingredient for many dishes and medicines.
Garlic, produced in large quantities, always pleases gardeners. But harvesting is only half the battle, because all this goodness also needs to be preserved for the long winter months. Today we propose to talk about how to properly dry this vegetable immediately after harvesting, so that it can be stored in whole heads all winter, and we will also talk about how to make garlic seasonings at home, in the form of chips and powder, from peeled garlic cloves .
Before harvesting this vegetable, you should avoid watering it for several days so that the soil remains dry and crumbly. If the day before passed heavy rain, then you should also wait a bit with cleaning.
Having pulled the heads out of the ground, they are laid out in one layer on the ridge and allowed to dry for 3 to 4 hours. After this, the crop is harvested under a well-ventilated canopy and dried there for 5 to 10 days.
After the green part of the plant dries, it is partially cut off, leaving a small stump of 5 - 6 centimeters. The garlic heads are placed in mesh boxes in a small layer and stored in a cool, dry place.
If you plan to store garlic in bundles or braids, then the tops are not cut off, but used for fastening. Bunches of garlic are hung at some distance from the ground in a dry room.
Watch the video from the channel " Useful Tips» — How to dry garlic
How to dry garlic cloves
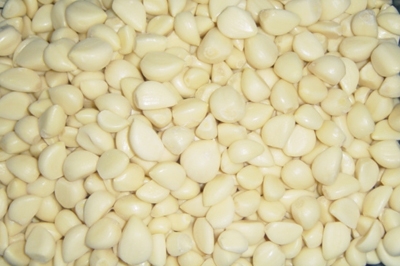
Before you start drying, you need to prepare the main product. The head of garlic is disassembled into individual cloves, each of which is then peeled. If the slices are darkened or damaged, they should be cut off with a knife.
There are several ways to chop garlic:
- Grind the garlic through a coarse grater. This method is not desirable, since when chopping, too much juice is released, which interferes with high-quality drying. In addition, the aromatic substances from such a product will disappear much faster.
- Grind food processor. The disadvantages of this method are the same as in the previous recipe.
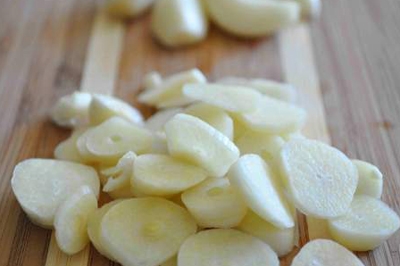
- Cut the garlic cloves into thin slices. This best option grinding for drying in oven and electric dryer.
- Cut the cloves in half lengthwise. This method is ideal for drying garlic in the fresh air.
Natural way of drying
Garlic cloves cut in half are laid out on a flat surface, cut side up. The pallet is placed in a dry and very well ventilated area. Important rule: should not be dried sunlight. Drying in the shade will help preserve maximum amount useful substances.
From time to time, garlic cloves should be checked for readiness. On average, the entire process takes from 10 to 14 days, provided it is dry warm weather. If the garlic cloves were initially large, and the weather was not good during drying, then you will have to wait much longer for the product to be ready.
Dry in the oven
Chopped into plates, the garlic is placed on a baking sheet. To keep the dishes clean, the bottom of the container is first covered with baking paper. The oven is heated to a temperature of 50 - 60 degrees and the garlic is sent there. To avoid excessive heat and ensure access fresh air, keep the oven door ajar.

40 minutes after the start of drying, the baking sheet is removed and the slices are turned over. After the garlic has cooled completely, it is sent back to dry.
The total oven drying time is approximately 3 – 6 hours. This mainly depends on the thickness of the original product.
How to dry garlic in a vegetable and fruit dryer
Garlic petals are laid out on drying racks in one layer. The heating temperature is set on the unit to 55 - 60 degrees. You can’t go higher, as excessive heat will destroy all the aromatic and beneficial substances of the vegetable.

The average drying time is 4 – 6 hours. This largely depends on the size of the cut and the humidity of the room in which dehydration is carried out.
The Ezidri Master channel in its video will talk about how to properly dry garlic
How to make garlic powder
Well-dried garlic can be used to make an excellent seasoning in powder form. To do this, garlic chips are placed in a blender or coffee grinder and beaten for 1 - 2 minutes. The crushed mass is sifted through a sieve in order to achieve a uniform consistency. If you grind the product for less time, you will get a coarse granular powder. It will be more noticeable in the finished dish.

How to store dried garlic
Fragile, crumbly garlic cloves are stored in jars, preferably made of dark glass, under a tightly screwed lid. This preparation is stored in a dry, dark place for a year, until the new harvest.

It turns out that garlic is an expensive pleasure. Its average market price is in no way inferior to expensive exotic vegetables and fruits. Many summer residents, knowing the unpretentiousness of the plant, try to grow and prepare the crop for wintering on their own. This means it’s time to learn how to dry garlic and determine the features of its storage.
Features of harvesting
Well-dried soil is the key to successful garlic harvesting. As a rule, they stop watering the soil approximately 2-3 days before its scheduled collection. Garlic is simply pulled out (dug) out of the soil. At this point, the harvesting work can be considered completed.
Now you need to remove the topmost layer of husk to remove dirt and clods of earth. At the same time, the teeth cannot be completely exposed.
Important! It is prohibited to wash garlic after digging, otherwise there is a risk of ending up with a moldy product.
Methods for preparing garlic for storage
The plant dug up after full ripening is dried in several ways:
- in room
- outside in the sun
- in the oven
- in an electric dryer.
In this case, the garlic heads can be dried entirely, or you can process only the cloves. Let's consider all the methods.
Drying indoors
Place the garlic in a single layer in a dry, well-ventilated room. We do not trim the stems, leaves and roots. Ultimately, it is by their condition that we will be able to determine the degree of readiness of the cloves for subsequent storage. Drying time is about 1 month. Uniform, discolored and brittle leaves are a signal that the crop is ready for further processing.
The time has come to cut off the roots, leaving about 0.3 cm from the head, and also get rid of the tops, leaving about 3-5 cm from the stem.
We put the finished product in boxes and put it in the attic or basement for storage.
By the way, many people like to store dried garlic in bundles, similar to onions. How do you like this option?
Drying outside
There are no particular difficulties in drying garlic outside. The algorithm of actions is similar to that described above.- the harvested crop is not washed
- plants are laid out on a wooden or any other surface in one row
- During the drying process, the garlic is turned over and put away indoors at night (in case of unexpected precipitation).
- dried stems and roots are cut off, maintaining a ratio of 3-5 cm and 0.3 cm
- The garlic is put into the pantry or other place prepared in advance for its storage.
Oven drying
Housewives have gotten used to drying garlic in a regular oven. They suggest the following method:
- garlic cloves are peeled, washed, cut into plates (petals) about 1 mm thick
- cover the baking sheet cling film or foil
- Place chopped garlic on the prepared surface in 1 row
- place the baking sheet in the oven for half an hour, setting the temperature to 50°C.
After the specified time has passed, the cooled dried garlic is placed in a container with an airtight lid.
Important! You must constantly monitor the product being prepared, otherwise it will burn out and acquire an unsightly brown tint.
Garlic in an electric dryer
Preparing aromatic spices for the winter can be done using an electric dryer. The cloves are first peeled, cut into rings or half-slices and placed on electric dryer trays with the cut side up. The heat treatment time of a product takes on average 5 – 18 hours and depends on the type household appliances.
To obtain granulated garlic or powder, the dried petals are ground using a coffee grinder.
Advice: do not make powder preparations for more than 1 month. This seasoning quickly cakes and becomes unsuitable for consumption. Store garlic in slabs and grind into powder only when necessary.
How to remove garlic skin without hassle?
This question is irrelevant for those who peel no more than one head, for example, for salad. However, when preparing garlic for the winter, you will have to peel more than one kilogram. If we take into account that from 2.5 kg of raw materials on average up to 0.5 kg of dried garlic is obtained, then preparatory work you will have to spend a lot of effort and time.
Plain water will help make the cleaning process easier. The cloves should be soaked for 20-30 minutes, after which, without harming your fingers, remove the softened skin with a knife.
And finally, about ready-made spices
Some housewives prefer to dry garlic along with other vegetables. The result is a ready-to-use seasoning, for example, for pizza.
First, cut into thin rings washed tomatoes of “not juicy” varieties such as “Cream”. If necessary, remove the watery core. We send the cuttings to the electric dryer. As the tomatoes dry out, add garlic and basil to the free space. Pour completely dried vegetables and herbs, along with garlic, into a jar with an airtight lid. Some of the pizza filling is ready.
To conclude the topic, we suggest you watch the video, which describes in detail one of the methods of drying garlic in an electric dryer:
All materials on the website are presented for informational purposes only. Before using any product, consultation with a doctor is MANDATORY!
Updated: 08-11-2019
Hello to all gardeners and gardeners!
It must be said that garlic is a very favorite crop among gardeners and summer residents, and many people grow it, albeit often in small quantities. This is due both to the fact that garlic is very beneficial for health, and to the fact that it is used as a seasoning in the vast majority of dishes, significantly improving their taste. In addition, it is impossible to do without garlic when making homemade preparations for the winter, that is, various canned foods, pickles and marinades, where garlic is used very widely.
However, while growing garlic is relatively easy, not everyone succeeds in removing and drying it properly before long-term storage.
That is why I will tell you how I have been harvesting and drying garlic in my garden for many years before storing it, as a result of which it is stored very well throughout the next year.
So, let me start with the fact that we grow them at home for long-term storage. winter garlic, sown in the fall. As a rule, in the middle - second half of July, this garlic fully ripens. The criterion for the maturity of garlic is the drying and yellowing of the tips of the leaves, as well as well-developed, large bulbs with several high-quality, thin and slightly dried out shells and a powerful bunch of roots.
It is advisable to harvest garlic not very early in the morning or in the first half of the day, in dry, sunny weather. This is due to the fact that immediately after harvesting, the garlic needs to be thoroughly dried in the sun. To do this, it can be laid out on film, wooden or iron pallets, or simply on the ground.
Towards evening, before the dew falls, the garlic should be collected and brought indoors, for example, into a barn. If the day was not very sunny, or the garlic did not dry for very long, it can be dried in the same way on the second day.
After this, the second, longer stage of drying the garlic begins, which is best done indoors. You can also place the garlic on pallets somewhere in the barn, but it is best to tie it into bunches (15-20 pieces) and hang it from the ceiling of the barn. It will dry much better and faster in bundles.


By the way, when I gather garlic into bunches, I make them in steps, that is, I place each subsequent head of garlic slightly higher than the previous ones. Garlic dries much better and faster in such bunches.

In this form, the garlic dries for another two to three weeks. In this case, the barn should be well ventilated, for example, by keeping its door open throughout the day and closing it only at night.
As a rule, after two to three weeks, the garlic should dry well, as evidenced by the straw-yellow color of all leaves and stems in the bunches.
Peeling and trimming garlic
Now the garlic can be peeled and trimmed.
To do this, I use two flat containers such as pallets or low boxes, as well as pruners and pliers with straight or curved jaws.

First, I take a bunch and, holding it over a container, cut off the heads of garlic with pruning shears, leaving small “stumps” 4-5 cm long.

Then I clean the cut heads with my hands, removing 1 or 2 upper shells from them.

And after that, I simply tear off a bunch of roots with pliers.


It must be said that the roots can be cut with powerful scissors, but as practice shows, tearing them off with pliers is much easier, faster, and cleaner. In addition, such heads of garlic subsequently dry out much better, and this also has a positive effect on storage.
However, not on all heads of garlic, the roots come off so cleanly and in the whole bunch at once. On some heads, the roots have to be torn off in two or three stages. But still, this can be done quite quickly with pliers.
I place the peeled heads of garlic in an orderly manner in an adjacent tray, and as such a tray, I use a large homemade scoop to remove shavings from the workbench.
As practice shows, it is very convenient to transfer garlic from this scoop into a tray with a mesh bottom, since the heads of garlic simply slide off the scoop onto the tray, remaining in the desired orientation, that is, with the stem trimmings facing up.


After that, all that remains is to trim them a little.


And now I have almost the entire pallet filled. By the way, I repeat that the bottom of the tray should be made of fine metal mesh for good ventilation and drying of the garlic heads.


And that's only less than half. In total, we will get about two and a half, or even three such pallets, so this amount of garlic should be more than enough for a whole year.
After such drying, the garlic, as a rule, is completely ready for subsequent long-term storage and can be safely placed in a container intended for this purpose, for example, wooden box and put it in a cool place at home, say on the floor, somewhere in a corner.
By the way, I would like to remind you once again that the best containers for storing garlic (as well as almost all vegetables and fruits) are containers or boxes made of natural, unpainted wood. Unlike others artificial materials based on wood (plywood, hardboard, chipboard and others), as well as plastic, natural wood allows air to pass through and regulates humidity, which creates optimal conditions for long-term and high-quality storage of crops.
Well, that's all for me! Bye everyone and good storage harvest!


