DIY china cabinet made of wood. How to make a buffet with your own hands from wood
The kitchen is one of the most important rooms in any family's home. For maximum convenience and comfort, you should equip it with not only beautiful, but also functional furniture, such as a buffet. And to make the interior original, you can make it yourself, putting your soul into the work, using any materials. This article will talk about how to build a buffet or sideboard for the kitchen with your own hands.
Sideboards and buffets for the kitchen do not have much difference and are very similar in appearance to each other, because... The ancestor of both is considered to be the closet. The only difference is that the buffet was used only for storing dishes, and in the sideboard they also stored tablecloths, napkins, towels and other table linen. And the buffet, unlike the sideboard, has a niche.
The modern market offers a wide range of raw materials of varying price and quality. Before making a choice in favor of one of them, you need to carefully study the properties and characteristics of these materials and compare them with the qualities that they should have. kitchen furniture.
Its surface, first of all, must be waterproof, because... During cooking, water constantly evaporates, increasing the humidity in the room.
The most popular materials today are chipboard, MDF, fiberboard and solid wood. Let's talk in more detail about each of them:
- Chipboard (chipboard). It is produced by pressing wood chips with phenol-formaldehyde or urea-formaldehyde resin. This material is widely used due to its low cost, as well as its hardness, strength and water-repellent properties. In addition, chipboard is very easy to process and holds nails better than wood. This material has a rich palette of colors and textures.
Unfortunately, chipboard has a number of serious disadvantages. This material can release substances hazardous to human health into the atmosphere. This effect is enhanced by temperature, so if you decide to use chipboard, you should not place furniture made from it near heating appliances.

Also, the material has some features that do not allow the manufacture of small and curved decorative elements from it.
- MDF or MDF (Medium Density Fiberboard), which translates from in English means medium density fiberboard. Just like chipboard, it is produced by pressing, only from smaller sawdust and without the use of resins. Lignin is used as a binder here. It is released from wood under the influence of high temperatures.
MDF is an environmentally friendly material, absolutely harmless to people and animals. It is even more resistant to humid environments than chipboard, making it most suitable for the kitchen.
MDF is both durable and soft material. This property makes it possible to make decorative elements of facades from it.
The only disadvantage of this material is its higher cost compared to chipboard.
- Fiberboard (fibreboard). For its production, wood residues obtained during processing or manufacturing of something are used. They are split into fibers, which are impregnated with glue and formed into slabs. They are exposed high temperature and then polished.
Fiberboard is not afraid of humidity and high temperature, is durable and lightweight, has a long service life and is low in cost. They hold fasteners well and can be milled.
This material is mainly used to make the back walls of cabinets and the bottoms of drawers.
- Solid wood. This material is natural and environmentally friendly. This is its main advantage. Properties directly depend on the type of wood used. For example, pine has high strength characteristics, is not difficult to process, and is easy to glue. Larch has water-repellent properties. Oak is not susceptible to rotting, but it is difficult to varnish.

Buffet from natural wood will look rich and elegant, but at the same time, it will cost much more than the materials described above. To get a beautiful product without spending too much, you can make the furniture body from cheaper raw materials, such as chipboard, and the facades from more expensive and beautiful ones.
Tools necessary for making a kitchen buffet with your own hands
As mentioned above, it is quite possible to make a sideboard or a cupboard for the kitchen yourself, without resorting to the help of professionals and without spending money on it. The product can be a rack, open or with a back wall, a buffet or sideboard with doors, etc. The scope for imagination is unlimited.
Before you begin, you need to stock up on a certain set of tools necessary for its successful completion:
- a circular saw;
- jigsaw;
- Grinder;
- drill;
- screwdriver;
- milling machine;
- varnish coating for wooden surfaces;
- wood drills;
- sheet for grinding, the abrasiveness of which ranges from 120 to 240 units;
- duct tape;
- roulette;
- pencil for notes and markings;
- vice for fixing workpieces;
- drawing (it must be prepared before starting work. It must clearly show all the necessary measurements, quantity, size, thickness of parts, places of their connections, etc.).
Instructions for making your own buffet
Modern buffets for the kitchen can be made based on step by step description of this process:
- Drilling holes in the side parts. The holes should be 5 mm in diameter and located in two rows on the inner plane of the outer side parts, and on both sides on the lower partitions.
To do this, you need to draw a line 3.7 cm from the leading and trailing edges. The holes will be lined up along it. It is necessary to mark on the line the position of each of them at the same distance from each other. The standard gap between them is 32 mm.

To avoid accidentally drilling through the side part, you must use a depth stop, which is attached directly to the drill and helps to adjust it. The holes themselves should be one centimeter deep.
If, after making your own sideboard, you get a taste for it and want to make other pieces of furniture yourself, it is best to buy a template to control the correct distance between the holes. The template is fixed motionless on a wooden slab, and holes are drilled directly through it. Using a template makes the task easier and makes it possible to make holes strictly vertically and at equal intervals.
- Connection of external sidewalls and partitions. The side parts and the upper and lower partitions are installed with their ends down, so that they appear in assembled form. After this, you need to make marks on the back edges with a pencil in order to further understand which part belongs to what. The bases also need to be marked.
Next, the upper bases and partitions need to be placed on the rear ends, so that they will connect to each other. All parameters must be taken into account and recorded in the drawing that you create before starting work. The parts must be clamped in a vice to prevent them from sliding and shifting. At the same time, you need to remember that dents may appear on the surface of the wood from them, and use wooden scraps.

After this, mark the places where the partitions lay on the bases. In the bases, in the center of the contour of the partitions, you need to drill a pair of holes 4 mm in diameter. The gap between them and the outer edges must be at least 3 cm. The holes in the bases should be countersunk (before this, drill holes for threaded connection in the cover plate, countersink them from below).
Now you can connect the bases to the partitions using countersunk screws and a screwdriver.
To prepare a threaded connection of two wooden elements, it is better to drill a hole for the screw using a drill that is 0.5-1 mm larger than its diameter; it needs to be countersunk to fit the screw head. It is better to drill the second part using a drill 1 mm narrower than the screw.
- Connection of the outer side parts and the upper part of the structure. Place the assembled upper part on the rear ends. Place the side parts and bottom of the future sideboard the way you are going to connect them. Use a pencil to mark the places where the contours of the bases come into contact with the sides.
Focusing on the center of the marking, drill two 4 mm holes and countersink them for screws from the outside. This must be done as carefully as possible so as not to spoil appearance products.

When all the holes are ready, all that remains is to connect them with countersunk screws and a screwdriver.
- Installation of internal structural elements. Install the product body on the rear ends. Mark the contact points of the lower partitions and bases with a pencil in the same way as described above. In the lower base, in the center of the contour, drill a pair of four-millimeter holes for each partition. Countersink them from the bottom.
Screw the lower part of the partitions to the base with screws, and the upper part with mounting angles. Install one corner on both sides of each sidewall flush with the surface. Then install the partitions between the bases and connect them with countersunk screws through the lower base, as well as through the mounting corners. The second paragraph of this instruction describes how to make a threaded connection.
- Assembling the elements of the base and its connection. All parts of the base should be placed on the surface as they will later be attached, and the edges should be marked with a pencil so that you can see where each part should be attached.
Drill holes for threaded connections in the panels and bars of the plinth. The panels are connected to each other using bars located in the corners in vertical position. The base elements are attached, according to the drawing, using a screwdriver.
- Attaching the cover plate to the body. In the second step of the instructions, you have already drilled holes in order to attach the cover plate to the body. First, place it where it will be located, leave 0.5 cm protrusions on the sides, and 2 cm in front and back. A protrusion of this size is necessary to hang the doors and attach the back wall.
- Rear wall connection. It can be attached either using dowels and glue, or using mounting angles and screws. Using a screwdriver, screw them onto the outer side parts of the body from the inside, flush with the rear edge, or to the internal planes of the base on the right and left sides.
Place the body on lateral surface. Position the back wall as it will join it. Secure it with a vice and screw it on the inside using corner fasteners.
- Attaching hinges and doors. Having placed the doors on the desktop, make notes with a pencil so as not to confuse the right with the left, top with bottom. You should also mark the lines where the loops will be inserted. The lines should pass through the centers of the holes arranged in two rows.
Turn the structure on its side and attach the door to it at an angle of 90 degrees. After this, you can easily transfer the markup to it. From the first door the lines are transferred to the second, using a ruler. For installation you will need curved hinges. The holes for them should be 4 cm from the edge. Mark 4 holes on the pencil lines and drill them using a wood drill bit larger than 1.2cm in diameter.

Insert the hinges into the holes and fasten them with screws. Install them in two holes in a row. Place the body on its side, attach the door to it at an angle of 90 degrees. Align it along the sidewall. Attach and secure the hinge holders to the support plates. Make holes for the handles and attach them.
- Now all that remains is to sand the surfaces (to treat them as best as possible, it is advisable to do this before assembly) and cover them with special wax, while observing safety precautions.
Such a piece of kitchen furniture as a buffet is now at the peak of popularity. It is practical and versatile, thanks to the many styles, shapes and configurations created by designers.
Large and massive, narrow and light, with or without display cases, rectangular and corner buffets for the kitchen are its decoration, and thanks to their diversity they can fit into any interior.
Wood is a unique material that is great for decorating various rooms. Not only is it of natural origin, but it also does not emit any toxic substances, but on the contrary, it enriches the air with essential oils. Perfect for making various furniture. It is distinguished by strength, aesthetics, practicality, environmental friendliness and durability.
Interior items made with your own hands increase the value of such items and make them unique. They bring comfort and warmth to the room, and delight the owner's eyes. This also allows you to bring even the most daring ideas to life. All you need is a little patience, wooden boards and tools that can be found in almost every home.
Benefits of a homemade buffet
If a person is comfortable with carpentry tools, then the work will not pose any problems or difficulties for him. A homemade buffet will decorate any kitchen, and it will greatly please any housewife. It is distinguished by its versatility and spaciousness. Now you don’t have to buy a lot of different cabinets to hide various small items or dishes. Everything fits comfortably in the kitchen cupboard.
Important! To ensure the maximum beneficial effect, it is worth considering not only the appearance of the structure, but also its functional tasks.
A wooden sideboard that you create yourself has a number of advantages. These advantages cannot be found in store furniture:
- the design can be selected based only on your preferences and imagination;
- the material is selected depending on your taste;
- it is possible to use original and unique fittings;
- pick up color scheme, which fits perfectly into the overall decor of the kitchen.
In addition, do not forget that material such as wood is extremely beneficial for human health and is compatible with pets. It contains no toxic compounds or substances. The room is filled with the aromas of essential oils, which make breathing easier.

Important! A sideboard and a sideboard are very reminiscent of each other because they have a common ancestor - a closet.
The wooden sideboard is strong and durable. It will quietly serve for decades and is easily amenable to restoration work, and if desired, you can adjust the design almost every year! Another positive feature of a homemade buffet is that it can be made in an original configuration and size that provides even greater comfort and convenience.
DIY buffet
Making a buffet is easy for those who know carpentry. When the preparatory work is completed (selection of materials, tools and necessary details), you can start assembling:
- Holes are drilled in the side parts.
- The buffet partitions are connected to each other.
- The upper part of the product is attached to the side.
- Internal parts are installed.
- Base elements are assembled and then fastened.
- The façade is being designed.
- The back wall is secured and the buffet body is placed on its side for a tight fit.
- Doors and hinges are installed.
- The furniture is installed in its permanent place.
They decorate using their imagination, resources and strength.
A handmade buffet will fit perfectly into the living room, dining room or kitchen. It has a similar appearance to the TV stand we made earlier. The same handles, the same finish, just a completely different purpose.
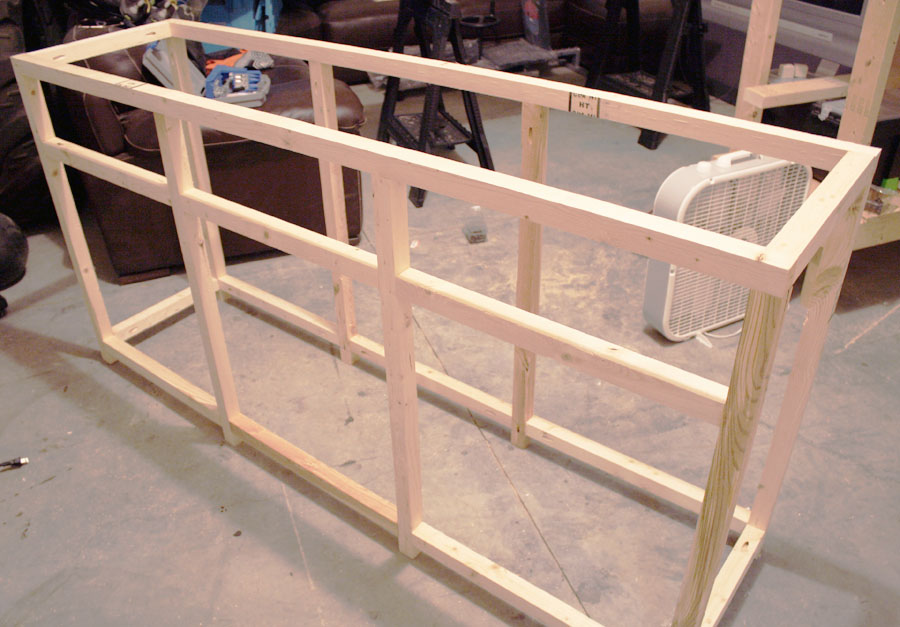
Facade frame
The first thing we will do is a frame frame, which will make it clear what dimensions of the body we will design. Four vertical bars are connected by twisting screws with horizontal bars. This results in three compartments for drawers and three for opening doors.
Doors.
They consist of two vertical boards onto which longitudinal boards, perfectly aligned using a plane, are nailed. You need three of these doors.

Fitting
We simply place our doors against the façade frame. Let's look at the result.

Buffet frame
By analogy with the front facade, we make a frame for the rear part of the frame and connect it in a circle with short bars. So we already have a full-fledged frame.

Bottom of the buffet
We turn the sideboard on its side and screw on a piece of plywood cut to fit the frame. We screw it in with self-tapping screws.

Partitions and side walls
We continue to complete the appearance of the buffet. We first screw in the internal partitions, and then the side walls. We screw the side walls both below and above, and the partitions only on the sides of the buffet frame.

Drawer guides
Since our drawers are drawers, they need guides; in each compartment we screw 2 boards - on the left and on the right.

Boxes
Quite a difficult stage of work. In order not to complicate it further, the boxes themselves were designed to be strictly square. In a square box it is easier to control the correctness of the angles and compliance with the required dimensions.

Trying on drawers
Having screwed two handles onto each drawer (an interesting decorative move), we insert the drawers and check how easily they slide out and whether they fit in size.

Door handles
As in the case of the TV stand, we added so many handles to the doors that it seemed that these were not swinging doors, but drawers. Quite an interesting and unusual way of decorating, isn’t it?

Painting
When the doors were already hung, the drawers were installed, and a beautiful top lid appeared on top of the buffet, it was time to remove all the screwed handles and begin important process finishing.
First, we process the surface with a sander with 320-grit sandpaper. Then we apply a thin layer of paint or stain to the surface of the sideboard. We wait for it to dry and repeat this operation after a short re-sanding.

DIY buffet is ready
That’s it, all that remains is to install it in a pre-prepared place and don’t forget to add fresh fruit, wine or decorative ornaments, which can transform the buffet beyond recognition.
If you prefer modern buffets, we recommend paying attention to the living rooms La Star Day or Roma, they have completely opposite accents than the buffet shown above, but at the same time they are no less functional and beautiful.

Interesting video.
Buffet decoration option
All photos from the article
The kitchen is one of the most important rooms in the house. It needs to be equipped with functional and aesthetic furniture, an example of which is a wooden sideboard for the cottage. To make the interior of the room exclusive, you can do it yourself.
At the same time, it is possible to make different variants piece of furniture: with a shelf, open on both sides, having doors and a back wall.
For example, pine has medium strength and is easy to process and glue. Larch has unique moisture resistance. Oak is very durable and almost does not rot, but it is poorly treated with varnish.
Note!
To ensure that the price of the product is not too high, its body can be made of inexpensive material, such as chipboard.
The facades can be made from the type of wood you like.
What tools and materials to prepare

- A circular saw.
- Jigsaw.
- Sander.
- Drill and screwdriver.
- Milling (vertical) machine.
- Several wood drills.
- Sandpaper (abrasiveness 120-240 units).
- Scotch.
- Tape measure and soft pencil.
- Clamps.
- Plate made of laminated wood and fiberboard.
Making a buffet
Cutting of product elements can be ordered according to a working drawing in a carpentry workshop.
Assembly of the body and facade
- Drill 2 rows of holes (diameter 0.5 cm, depth 1 cm) from the inside of the outer sides, as well as from both sides of the partitions (bottom). For this purpose, draw two lines, 3.7 cm apart from the back and front edges. The centers of the holes will follow the lines. Mark them in 3.2 cm increments, then drill holes.

- Place the outer sides, bottom and top partitions with their ends facing down the way they will be assembled. The upper bases and partitions are placed on their rear ends. Secure the elements with clamps. Drill two holes in the bases. Do this in the middle of the partition contours at a distance of 3 cm from the outer edges.
- Countersink the holes and fasten the bases and partitions with self-tapping screws with a countersunk head (fastening size 4×50 mm).
- Place the assembled top assembly on the rear end. Align the sides and the bottom (long) base so that the body fits into correct position for connection. Using a pencil, transfer the outlines of the bases to the inner sides of the sides.
- Drill 2 holes (diameter 0.4 cm) in the middle of the markings and countersink them from the outside. Screw the housing elements with the same countersunk screws.
- Drill holes in the bottom base. There should be 2 holes (diameter 0.4 cm) on each partition (in the middle of the contour). Countersink holes from the bottom. Screw the partitions from below to the bottom base. You can use the mounting angles at the top.
- Place partitions prepared for mating between the bases. Screw countersunk screws (4x50 mm) through the bottom base and screws (3x17 mm) through the mounting angles.
Connection of base and rear wall elements

- Next, when making a solid wood sideboard, place the short and long plinth panels as they should be assembled. Mark the edges. Drill holes for threaded connections in the bars and panels. Then connect the base elements with self-tapping screws (4x60 mm).
Note!
The panels are mated to each other in a cross pattern, using vertical ones.
Based on this, drill holes in these racks with the required offset.
- Drill holes in the strips that will connect the base to the body. Screw the strips flush with the top edges to the short plinth panels. Next, turn the case over and trim the base at the bottom. Screw the connecting strips to the bottom base of the housing.
- TO internal parties Screw on 2 corners of the body sides. Do this flush with the back edge. Lay the sideboard body on its side. Align the back wall with its side edge. Secure the fiberboard with clamps, then secure it from the inside with corners.
Installation of hinges

The photo shows the installation of hinges.
- Next, when making a wooden buffet with your own hands, mark the doors. Mark the center lines of the hinge mounting points on the back surfaces of the canvases. They should go in the middle of the holes placed in 2 rows.
- Place the body on the side and place the corresponding blade on it, as if it were opened 90 degrees. Draw the axis lines onto the door.
- On the second canvas, the markings are copied from the first. For this purpose, use a corner or ruler.
- For buffet doors you will need so-called “corner” hinges. The distance between the holes for them and the edge should be 4 cm.
- Draw the four center points of the holes on the axle lines. Make holes with a Forstner drill, its cross-section should be 3.5 cm. Then hang the hinges and doors.
From this article you will learn:
- How buffets came to be
- What is good about a buffet in a kitchen interior?
- What types of kitchen buffets are there?
- What styles of kitchen buffets are available?
- What materials are used to make a kitchen buffet?
- How should the kitchen buffet be filled?
- How to decorate a kitchen buffet
- How design ideas can be applied to a buffet
- How to choose a buffet for the kitchen
- How to make a kitchen buffet with your own hands
A buffet or sideboard usually evokes associations with Soviet or country cuisine. However, this piece of furniture can organically fit into modern interior your house. Manufacturers offer many interesting models of buffets. We will tell you in our article about what a kitchen buffet can be and how to choose it so that it does not look like a relic of the past.
The first buffets appeared in France at the beginning of the 15th century. Rich nobles kept expensive dishes made of porcelain and silver in them. The closet usually had two compartments with doors that were locked.
The word "buffet" comes from the Latin "bufetum", which means "brilliant table".
In the 17th century, the appearance of sideboards underwent changes, and they became similar to modern furniture. In the upper part of the cabinet there were open shelves for plates and glasses (with or without doors), in the middle there were drawers for cutlery, and in the lower part there were shelves with blind doors for heavy dishes.
Between the middle and lower compartments there was a tabletop. It was used to prepare dishes before serving and for preparing light snacks. This is where the second meaning of the word “buffet” comes from – a place for a snack.
The French buffet was so convenient that wealthy people from other European countries also began to buy similar furniture for themselves. Later such kitchen cabinets appeared in the homes of the middle class.
- Furniture fashion trends: materials, colors, styles
- How to choose nice sofa: mechanisms, frame, filling and upholstery
- Furniture in beige tones: choosing the right one
In Russia they used an analogue of the European buffet - a massive cabinet on metal legs, in which samovars, jam and containers for heating water were stored.
During Soviet times, the buffet became lighter and more similar to Western models.
Modern sideboards and buffets for the kitchen come in different sizes, colors and designs, but their design is practically no different from the original French version.
What is good about a buffet in a kitchen interior?
The main purpose of the buffet is to store dishes, forks, spoons, knives, tablecloths, napkins, salt shakers and other table serving items. Such a cabinet can be placed not only in the kitchen, but also in the living room.
So, as mentioned above, classic design The buffet consists of three compartments:
in the lower part there are drawers or shelves with doors;
in the top there are open shelves with or without glass doors;
between two compartments there is usually free space, which is used as a tabletop or decorated with souvenirs and other interior items (vases, figurines).
Modern kitchen sideboards are rarely overloaded with decorative elements, so they easily fit into different style trends: minimalism, hi-tech, country, modern, Provence.
Today they also create buffets without a clear division into upper and lower parts, that is, there is no tabletop in such models.
There are no uniform standards and sizes of modern buffets. There are narrow ones with one door and wide ones with several doors. You can buy a ready-made buffet or make it to order according to your parameters, based on the height of the ceilings, kitchen area and personal wishes.
Advantages of a kitchen buffet:
- Capacity. Everything will fit: from grandma’s set for 20 people to a crystal vase or a collection of glasses.
- Versatility. Fits into any interior and adds zest to the space.
- Environmental friendliness. Sideboards are usually made from wood.
- Individuality. You can make it to order or choose in the store the model that will satisfy all your needs.
Read also: Buffet in Provence style: types, nuances, design tips
Types of buffet for the kitchen
By design, buffets are:
- Closed type– with shelves closed by doors. There are cabinets with small windows through which the contents are visible.
- Open type - with shelves, but without doors. Maybe with a tabletop.
- Classic type - there is an upper part with shelves and glass doors, a lower part with blind doors and a niche or tabletop between them.
According to the shape of the frame, the buffet can be:
straight - traditional rectangular model, which can be placed along the wall;
corner - a buffet for the kitchen in the form of the letter L or trapezoid. Such a cabinet fits only in the corner of the room. If the design of the kitchen unit is dominated by smooth lines, then models with a radius facade are suitable.
Kitchen Buffet Styles
- Classic style.
These are carved solid wood cabinets with etched or glass doors. The fittings (legs, handles) are curved.
- Retro style.
This is either an antique buffet or a modern one, but artificially aged. To make the cabinet even more authentic, they use the decoupage technique, paint it light shades and add patina.
- Provence.
A cabinet with stained glass doors, made from modern materials, but with an antique effect. It is appropriate to use patina, decoupage, carvings, and flower images in decoration.
- Country.
Such furniture is made from solid wood. A country style buffet looks solid and even bulky. Prevail simple shapes, without unnecessary decor and frills. Focus on functionality: lots of drawers different sizes for any kitchen utensils.
- Scandinavian style.
The traditional color of a Scandinavian buffet is white. The laconic design allows the use of chrome fittings. In addition to wood, glass, plastic, acrylic or other modern materials are used in the manufacture of buffets.
- Modern.
Such buffets are made in light pastel colors. The decor contains decorations in the form of carvings, ornate patterns and ornaments. Smooth lines, plant compositions and semicircular shapes are popular.
- High tech.
A characteristic feature of the style is clear lines and the absence of decorative elements. The fronts of a kitchen buffet in this style use metal inserts and glossy glass.
Read also: How to choose furniture for the kitchen: photos, nuances, recommendations
What materials are kitchen buffets made from?
- Valuable species of natural wood.
This buffet looks expensive and will last for several generations of the family. The price, of course, will be above average. The facades are usually decorated with carvings. It is important that the frame and facades are treated with high-quality moisture-resistant materials.
- MDF and chipboard.
These are more budget-friendly materials, but also less durable. However, due to the relatively low cost, products made from them are in certain demand on the market.
You can also find kitchen buffets made of plastic or metal.
Stocking the buffet in the kitchen
The internal content of the buffet depends on the needs of the owners. You can choose the required combination from the basic elements:
Shelves: open ones are for decorative items, closed ones are for dishes and cutlery.
Deep drawers for tablecloths, plates, pots and pans.
Flat drawers - for forks, spoons, knives.
In modern buffets you can choose different designs door In the classic version, these are swing doors that open outward. There are also sliding doors (like in wardrobes) and folding doors (like a book or accordion).
For upper shelves it is more convenient to use folding doors with lifting mechanisms - spring or gas lifts.
Buffet decor for the kitchen
Depending on the style of the buffet, they are used different kinds decor:
carving - patterns carved into wood;
engraving – patterns applied to metal or other hard material;
glazing – for upper facades. If you need to hide the contents of the cabinet, the doors are made not transparent, but darkened or a stained glass pattern is applied.
How to choose a buffet for the kitchen
Each person will have their own buffet to their liking. Some people need, first of all, roomy, others – antique, and others, on the contrary, in accordance with the latest trends in the interior. But let’s highlight the main parameters that you should focus on when choosing a buffet:
- Style.
It is more correct to first draw up a design project for the kitchen or the entire apartment in order to understand what kind of interior you will have, and only then choose a buffet. If it is not possible to hire a designer, just look through catalogs or look at thematic websites to decide which style trends you like. Pictures can be saved to Pinterest, your phone, or your desktop.
Having decided on the style, you can choose furniture. Of course, you don’t have to do any preliminary preparation, but simply go to a furniture store or look for a kitchen buffet in an online store. But in this case, you risk buying furniture of completely different designs. Some people manage to mix successfully different styles in one interior. Therefore, it is better not to take risks, otherwise you may end up with an “expensive-rich” option, but not at all stylish.
- Dimensions, internal contents, functionality, materials from which the buffet will be made.
Decide what dishes and how many you want to store in the cabinet. How many open and closed shelves do you need? How tall should the boxes be? Do you need a countertop?
- Dimensions of the buffet.
They are different:
width – from 120 to 200 cm;
depth – from 40 to 60 cm;
height – from 180 to 200 cm.
For a small kitchen, you can also find more compact models - 80-120 cm wide.
Restoration of a kitchen buffet
If you are lucky and received an antique sideboard from your relatives, you can restore it yourself and adapt it to the interior of your apartment. Designers offer good advice how to do it effectively and easily with your own hands:
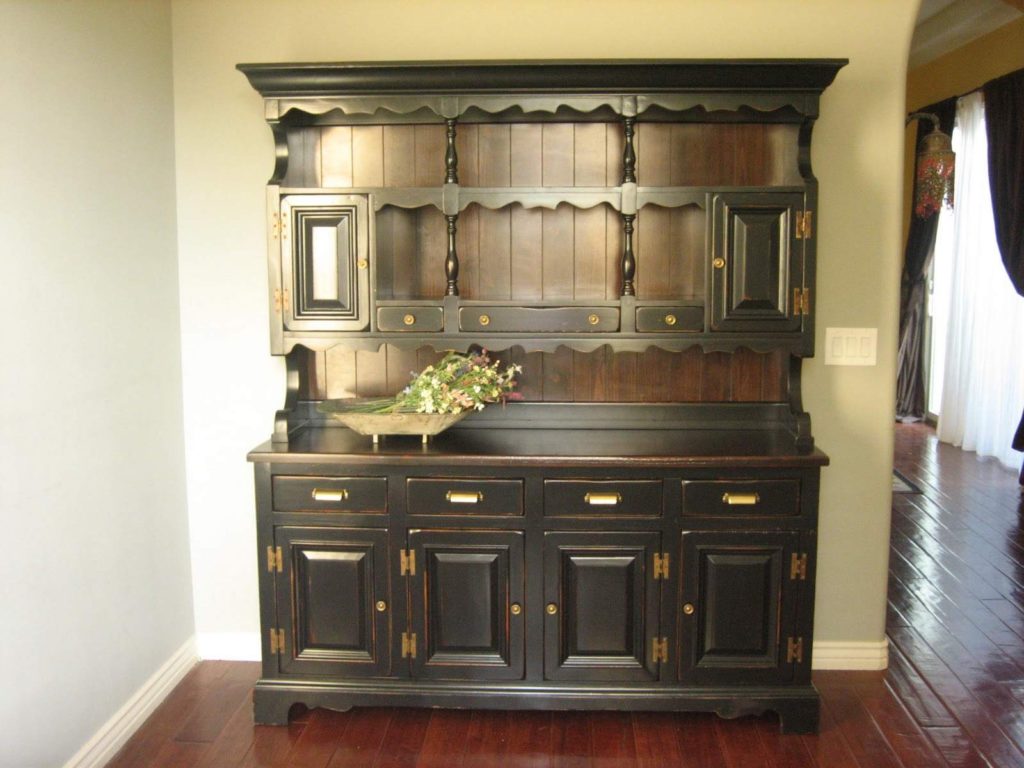
- Paint an old sideboard a bright color that complements your decor.
- A natural wood buffet needs to be varnished. Paint is not suitable here, as it “cheapens” the appearance of antique furniture.
- Paint the outside of the cabinet with paint in neutral shades (for example, pastel, like in the Provence style), and choose bright rich colors for the interior decoration. This will look especially impressive at the top of a buffet with glass doors.
- Create the effect of antiquity during the restoration process. There are different techniques for artificial aging: surface treatment with sandpaper, coating with craquelure varnish or using decoupage techniques.
Before applying any finishing(paint, varnish, etc.), be sure to prepare the surface of the cabinet. First you need to sand it thoroughly, then sand it, wash it with soap and apply a primer.
Read also: Furniture for a home bar: types, location nuances, ideas
Where to buy a solid wood kitchen buffet
The online furniture store LOFT by Wellige is pleased to present you with fashion trends, bright interior solutions and, of course, high-quality furniture made of natural wood. Already for a long time the company helps make the dream of an ideal interior a reality by presenting unique collections of Belarusian solid wood furniture for living rooms, bedrooms, children's rooms, offices, libraries, dining rooms, hallways, kitchens, baths, verandas in country, loft and eco style. Furniture is manufactured in the oldest factories in Belarus, equipped with new technological equipment. Some of them work only for the LOFT by Wellige online store, so this furniture is considered exclusive.
Customers choose Wellige because the store offers:
- Stylish furniture made according to the latest trends in the world of design.
- Quality furniture only from natural wood (oak, beech, pine, birch).
- Safe Decoration Materials: waxes, varnishes, oils and water-based paints.
- Collection designs developed by in-house designers together with foreign colleagues.
- Handmade experienced cabinetmakers.
- Modern environmentally friendly production and finishing technologies.
BACK TO LIST OF ARTICLES
DIY cabinet installation
Tools for mounting the cabinet you will need:
- hacksaw for woodworking, drill, self-tapping screws, screws and nails.
Before you start work, the main thing is to complete all the necessary calculations, make drawings, and markings. To do this you will need a level, a ruler and a simple pencil.
According to the drawing, you can begin marking out the parts; you need to be extremely careful so that all the parts are even in length and width. If possible, then it is better to use the services of craftsmen, and then assemble the finished parts yourself, but if this is not possible, then you can make a decent simple cabinet yourself. According to the standards, the optimal dimensions for the cabinet will be:
- height from 2 to 2.5 meters, length from 1 meter to 1.3 meters, depth 0.5 meters.
Having made the correct calculations and having the necessary materials and tools, you can make an excellent loggia cabinet yourself, with any design, shape and parameters.
Design of engineering systems: features and stages of work
Correct design of engineering systems is the key to successful construction of a facility. The comfort of the future premises directly depends on how correctly the calculations are made. Every year, the requirements for engineering systems increase, modern technologies are being introduced, so drawing up a project takes a lot of time and effort.
The price depends on the area of the object and its features, the amount can reach about forty percent of the entire cost of the house project. List of categories: No matter how small your apartment is, it requires a spacious closet. Purchasing a new piece of furniture is not affordable for everyone, but if you have the necessary skills, you can build the cabinet yourself. And not all factory-made options are suitable for a certain interior. The discrepancy can be expressed not only in design or color scheme, but also in size.
And if redevelopment is coming to your apartment, then making a cabinet yourself may be the only right approach. For small rooms, sliding wardrobes are the most convenient, the main advantage of which is sliding doors, they allow you to install the structure even in a narrow corridor. Another advantage of such a product is the ability to make it to specific sizes and configuration of the room. By visiting the store, you can find a variety of accessories that will allow you to realize your wildest ideas.
You can make a wooden cabinet with your own hands using available tools. Most often, laminated chipboard is used for this, which is available for sale in a wide range, because the material can have almost any color. The rear wall of the structure is best made of hardboard, selecting additional simple fittings. A standard laminated chipboard sheet is 16 mm thick, while its length can be 2450 or 2750 mm.
As for the height, this parameter is 1830 mm. That is why it is necessary to build on these dimensions so as not to cut the material. Optimal sizes the cabinets will be 2450 x 2400 x 650 mm. If we compare with the swing option, then in this case the depth is somewhat greater; do not forget about the need for permission for the sliding system.
If you decide to make a wooden cabinet with your own hands, then you need to take care of the availability of blanks.
You will need a 0.5 mm melamine edge, which you can fix yourself. There will be two side parts, their dimensions are 2433 x 650 mm. The top cover and bottom are the same in depth, which is 650 mm, while the length will be slightly different. For the first workpiece this parameter is 2400, for the second it is 2367 mm. You will need two plinths, their dimensions are 2367 x 100 mm.
It is important to take care of the presence of two partitions, as well as an upper shelf, the dimensions of these elements are as follows: 1917 x 550 and 2367 x 550 mm. There will be seven shelves in such a cabinet, their dimensions are 778 x 550 mm, while there will be three side parts of the plinth box, their dimensions are 550 x 100 mm. It is necessary to prepare two ribs for the plinth box, their dimensions are as follows: 1159 x 100 mm. If you want to make a wooden cabinet with your own hands, then it is best not to cut it laminated chipboard sheet at home, it is better to entrust this matter to specialists.
Preparation of tools and materials
To carry out work on making a cabinet from solid wood you will need:
- plumb line; fasteners; screwdriver.
Should be prepared electric jigsaw, a building level, a long metal ruler, and a drill.
You can order the doors ready-made, but you can make them yourself. Among other things, you will need three boards, the dimensions of each of which will be 1500 x 600 mm. Two more boards should have the following dimensions: 2000 x 600 mm.
The vertical partition must have the following dimensions: 1350 x 600 mm. For vertical partitions, horizontal shelves and partitions under shelves you will need elements, each of which should be 3 pieces. The dimensions will be as follows (sequence taken into account): 325 x 600; 1500 x 300; 300 x 400 mm.
When making a solid wood cabinet with your own hands, after preparing the tools and materials, you can proceed to assembly. The board with dimensions 1500 x 600 mm is laid on a horizontal surface.
The side boards are strengthened on both sides; for this you should use metal corners and dowels. Now you can start making the structure for the shelves; for this you need to use a vertical board with dimensions of 1500 x 600 mm. Three more boards with dimensions of 325 x 600 mm are installed across, using the same corners and screws.
The resulting structure can be installed in the opening and then fixed to the body. If you decide to make a cabinet with your own hands from wood, you can prepare drawings; they will allow you to avoid mistakes.
Shelves should be installed on top; for this, boards with the following dimensions are used: 1500 x 300 mm. Three more vertical boards will be partitions, they should be installed on the vertical guide. Ultimately, you will be able to get a closet that has lower compartments, as well as shelves for underwear.
Main design features and interior features of a chalet-style kitchen
Spruce wood, sandstone, and granite rubble are the main building materials in mountainous areas. But a kitchen with imitation involves the use only visible side. Modern chalet-style materials are subtle, refined, and all their roughness is deliberate. They are highly technological in processing.
Rubble floor tiles, decorative wall materials reminiscent of rough whitewash, tiles with “chips” are imitated by relief, texture, self-leveling glazes and granular compositions of fireclay ceramics.
Only heavy furniture remained authentic, often made from hand-aged solid wood. The wood in chalet interiors is always natural. You can recreate a hand-weaving pattern with a print, tin saucers with a patina, but plastic in wall decoration can never compete with the charm of shawl boards, which are omnipresent and integral in a chalet.
Board or plinth
When planning a floor, the designer considers the finish comprehensively. Factors taken into account:
- diversity,
- rhythm of details,
- reflection from surfaces of light,
- restraint or frivolity of forms - depends on the taste preferences of the owners,
- cleaning method.
Diversity is due to the undesirability of the effect that occurs when there is an excess of a particular material. The overall rhythm is disrupted by too large parquet floors, small pebbles, and bulky details that visually oppress, destroying harmony.
A dark floor will not reflect on the ceiling. The room will be dark, contrasting for the eyes. Excessive mosaic will wash away its ascetic mood from the chalet.
They often wear shoes - the tree doesn’t like that. It needs to be scraped and varnished often. Debris accumulates in the gaps of rough tiles - troubles of a different nature. Optimal when averaged: slightly gray, unobtrusive, glazed, but without shine.
Half-timbered ceiling structures
Structures up to the ridge, without attic floors, restrained by alpine winds. It's needed there. But is this acceptable and appropriate in the kitchen?
It is possible to open structures when:
- the kitchen is on the last attic floor,
- The kitchen is adjacent to other rigid structures with a sloping roof.
The first case is copied: the entrance to the kitchen is through the second floor and above the living room. The second case is good when the kitchen plan is a hexagon. Then the beams go into the wall like rays.
All the examples described are not for high-rise apartments. Several polyurethane beams (repeated every meter and a half) would be meaningless if not for the possibility of inserting LEDs. Light from under a beam is especially popular. The 15 cm high polyurethane appears to be hanging, with a gap above it.
Wall decoration
The rule is this: there is a stone on the floor, a board above. And vice versa. Without overusing either one or the other, you can add “stone” or plank shelves. However, a separate plinth column up to the ceiling, “floating”, elongated tiles, as well as vertical or inclined columns also have a right to exist. Plus furniture.
The indicators are typical for a normal design and environment. Any “tilt” in one direction or another must be compensated by the refusal of decor from some elements in favor of others. In addition to shelves, beams, posts and tiles, color may be included. An unobtrusive shade will not become a decorative element. But a bright spot is already an accent.
Functional decor
Meissen porcelain (or a good imitation of it) will decorate a plank wall with the shine of its glaze and variegated patterns. Woven napkins hanging at the corners from the shelves are also very useful.
The religious inhabitants of the Alps keep things related to Christmas, Easter and the Annunciation all year round. Statues of angels, the Virgin Mary, willow with ribbons, bright boxwood wreaths - all this is on display.
Textile
Red, white and black goat blankets cover the wooden sofas. Homespun paths outline the area around the table. The curtains are mostly checkered. They are brown, gray, orange. Fine weaving motifs in a chalet kitchen are rare. Very modern: stripes, squares!
Where there is a lot of firewood, the fireplace mouth is wide. The fireplace is shallow: winters are snowy, but not very frosty. Therefore, the firebox with the chimney was often taken outside. Hence the visibility of the entire beam structure: the stone is narrow, but the logs are massive. The fireplace is always crowned with an oak board-shelf.
Buffet with tureens behind glass, which can be removed special occasion– the pride of the owner of the chalet kitchen. The glass doors are thick and convex because they are self-leveling. Handles turned from pine, contour carvings – that’s all the meager decor.
You can hardly find consoles on the shelves: the boards are attached directly to the wall. The same simple table. But it is long, designed for household members and lost skiers. Hearts on the backs of chairs are decorative and for ease of movement. The solid wood backs are too heavy. The legs are chiseled, protruding to the sides. There is enough space in such a kitchen for feasting and cooking.
Appliances
Progress does not stand still, designers are working to match the style:
- the brazier-fireplace with the letter G impresses with the flames behind the glass door,
- a stainless steel gas stove must have a chiseled bronze handle,
- the refrigerator is hidden behind a wooden hinged panel,
- There is no need to hide the kebab maker, because spits are a fireplace theme.
Stylish little things
Everything combining steel and wood is on display: trays, ladles, milk ladles, tongs and knife sets. Lighting cylindrical (“inverted basin”) or rectangular grilles with embedded light bulbs are desirable. Crossbars and hooks are screwed to the apron, and the supporting wooden frame The pyramidal hood is so wide that it can accommodate cups. The faience motif is pastoral.
Color solutions
In addition to sand and golden wood, the chalet style involves the use of a grayish tint from bleached wood. A special development by modern designers makes it possible to avoid oversaturation of brown tones. The scarlet decor looks like it has faded. But endless cream options expand the range. Among cool shades, preference should be given to faint blue. It is especially good on an apron if the ceramics are of the “sieve” type.
Yellowish walls can aggravate the overall structure, so gray from violet (weak cold tone) is preferable. Joyful accents include white napkins on the dishes.
- lay out the apron of the kitchen set with wood-like tiles,
- order the tabletop slab from stone agglomerate,
- order a table, chairs and kitchen furniture from one customer from the same material.
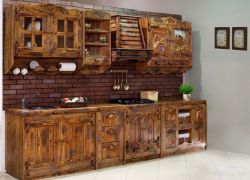
The mention of the word “kitchen” for most people evokes pleasant memories of grandmother’s delicious pies, intimate friendly gatherings, Sunday family dinners, and simply the kitchen is a symbol for many hearth and home and hospitality, a kind of calling card of the house. That is why the design of the kitchen is given top priority - sparing no time in selecting the layout, stylistic direction of the interior, finishing materials, furniture and all kinds of accessories, while trying to choose the highest quality and environmentally friendly clean materials. What could be better and more beautiful? natural materials, for example, a tree? It is a kitchen made of wood that will help create a special atmosphere home comfort, unobtrusively emphasizing the respectability and stability of the owners.
Wooden kitchen furniture
Kitchens made from natural wood are designed primarily for people with a certain level of income, respectable and balanced, who prefer stability in everything, even in interior design. Such kitchen furniture can be purchased either at a furniture store or ordered from a specialized workshop. In the first case, the kitchen set is assembled from the proposed modular components (tables, wall cabinets, shelves) standard sizes. Since almost all manufacturers provide several options for countertops and furniture facades, then it will not be difficult to choose them in accordance with your taste and interior features. Countertops are typically made from laminated MDF, although premium furniture sets may use marble or, more practical, artificial stone.
Kitchen facades made of wood can also have several options. First of all, the facade can be made from solid wood of various types of wood - oak, ash, alder, maple, cherry, black cherry, etc., that is, there are options for choosing the “pattern” of the wood. The next option is that kitchen facades can be treated with special wax-based mastics, while maintaining natural look wood used, or covered with tinting compounds / note - more than 100 shades are used color palette/. Further. External options available kitchen facades made of natural wood - straight, bent, with a solid panel or under glass, with decorative grille made of wood or rattan.
When making a custom-made kitchen from wood, its design will be unique, developed taking into account all the wishes of the customer. In this case they can be used as additional elements decor, as well as special methods of surface treatment of kitchen facades. For example, artistic wood carving or inlay can be used. A kitchen made of antique wood looks very interesting when all the front surfaces are treated with a patina method.
Modern kitchen made of wood
Modern kitchen furniture, made of natural wood using the latest technologies, practical and functional accessories and fixtures, fits perfectly into any kitchen design style. Thus, a kitchen made of wood will successfully emphasize the nobility of an interior decorated in a classic style. Even in a city apartment, it will create a cozy atmosphere of a country house when decorating the interior in a country style. And what can we say about the interior in eco-style. It is in this kind of interior that wooden furniture made with clear lines and natural color shades will harmoniously fit.
How to make a new, exclusive one from an old buffet with your own hands
Look at the step-by-step description with photos on the House of Hope website.
See photos and descriptions of the main stages of work.
Important: the process is labor-intensive and slow. Each time it is necessary to thoroughly dry all layers of paint. Carry out all operations for applying decorative elements carefully and accurately.
We will need:
- acrylic paint in the color you need
- acrylic construction varnish
- stencils for applying designs to doors and glass door edgings
- narrow masking tape for applying a design to the side walls of our buffet
- wide masking tape to protect glass and other surfaces
- special stencil brush
- application brushes acrylic base and varnish coatings, door handles
view of the buffet before remodeling
This is what the buffet looked like before the remodel.
long labor-intensive staining
We carefully paint all surfaces of the buffet with a roller and brushes. Please note that first I disassembled the entire buffet: I removed all the doors, metal parts, and sealed the glass with wide masking tape. There was only one undisassembled frame of the cabinet left.
So we first paint it with white acrylic paint. I got the color I wanted by mixing white paint and ocher paint. The color turned out to be ivory. It is necessary to cover the walls several times. Each time, wait patiently for it to dry completely.
Then I mixed white acrylic paint and turquoise to the mint color I had in mind. This will be the main color of the new sideboard. I carefully painted all surfaces with the resulting mint color.
The same fate befell all previously removed doors and shelves.
decorate the doors using a stencil
Since, according to the plan, the doors should be decorated with a stencil pattern, I thought in advance about the combination of colors and the placement of stencils on the surfaces prepared for this operation. Very carefully, using a stencil brush, I applied the selected paint over the applied stencil. A sponge is not suitable for this purpose, as streaks may form under the stencil and the work will be ruined.
we make a “lattice” on the sides of the buffet
I taped the shelves and side walls with masking tape to form a lattice. I went over the resulting stencil with ivory paint. The result was a lattice of light pastel colors.
As you can see, the pattern of the side grilles and the stencil pattern on the glass and bottom solid doors are in perfect harmony with each other.
We attach the selected handles to all doors. Carefully mark the locations for fasteners and just as carefully drill holes for the mounting bolts for the handles.
Now our old buffet from a German set looks like this.
This is a real pearl in the interior of the apartment. A special, designer buffet, transformed with your own hands, radiating with the care and warmth of your hands put into it.
Note: On the decorated buffet, upstairs, are decoupage plates that I make myself.
Our workshop has completed the restoration of an antique sideboard from the early 20th century. Thanks to the active participation of the owner Andrei Sokolov and his relatives, we learned the amazing history of this work of art: where and when it was made in St. Petersburg, who its first owners were, we learned the extensive geography of the buffet’s travels across Russia and when it came to Moscow. (history of the buffet and condition before restoration)
And we hope that after our restoration work he will still long years will delight its owners, as it is truly one of the amazing family heirlooms that is passed down from generation to generation.
Andrey sent us this photo with the words:
“This photo was taken around 1950 in Moscow in communal apartment on Tokmakov Lane, where my grandfather, great-grandfather and great-grandmother lived after the war.”
But before we show you the result of the restoration of the sideboard, let's quickly remember in what condition it arrived at our workshop.
General state it was deplorable:
— front legs were missing;
— there were not enough thread elements;
— large losses of veneer and numerous missing fragments of panels;
— the entire structure of the buffet is very loose.
You can follow almost all restoration stages on our website (damage repair, damage repair and sizing, painting).
And we are proud to present to you the result of the restoration work of Viktor Morozov’s workshop.
Materials and tools for work
Most likely everyone the right tools To restore a wooden sideboard, you will not have it in stock. Then review the list and buy the missing accessories at a regular construction supermarket. They will be useful to you in the future in case you want to update something else with your own hands after the sideboard.
List of required tools and materials:
- sandpaper of different numbers;
- spatula;
- steel sponge;
- furniture scraper;
- clamps;
- screwdrivers of different formats;
- wood glue;
- oil paints;
- stain;
- solutions for removing old paint and varnish;
- brushes;
- wood putty;
- ruler, tape measure and square;
- furniture markers;
- gloves and respirator;
You may also need a regular toothbrush, toothpick, and other utensils that you always have on hand.
Partial restoration
If the thought of completely removing the varnish and applying a new coating is not to your liking, then do a partial restoration. This applies to varnish that is damaged in certain places.
Step-by-step description of actions:
- if the defective area does not contain prominent bubbles or cracks, then wipe it with gasoline - this will remove grease;
- rub the dry, grease-free area with an iron wool, removing the layer of varnish;
- Use a dry cloth to remove any remaining varnish dust and apply fresh varnish. You need to use the same type of varnish that was used for the previous coating;
If the measures described above do not save your sideboard, then later in the article you will find how to completely update the coating.
Complete restoration
The most troublesome and uninteresting stage in any restoration process is removing old paint and varnish. To quickly remove them with your own hands, you can find special solutions on sale. They contain methylene chloride, which dissolves old varnish or paint in just 20 minutes. After this, the paint can be easily removed with a spatula, and in the recesses and seams - with a toothpick and an old toothbrush.
Furniture should be placed outside or on spread paper to prevent solvents from falling pieces of varnish from damaging the floor.
So, you have removed the paint or varnish, and now you are faced with choosing further tactics.
We offer you several different techniques for updating an old sideboard (buffet) with your own hands:
- decoupage;
- artificial aging;
- painting or varnishing.
The first two points are worth paying attention to Special attention– they allow you to work with furniture that has traces of antiquity. Such traces are more desirable than negative. Decoupage, like the grunge style, loves a rare look. All these techniques are quite doable with your own hands.
Decoupage of an old sideboard - the atmosphere of Provence
To perform decoupage you will need to supplement the list of materials and tools.
Materials for decoupage:
- new “antique” handles and door hinges;
- napkins for decoupage;
- PVA glue;
- White paint;
- furniture varnish;
- sandpaper;
- stain;
- wood putty;
- metal brush.
You can buy napkins for the decoupage technique at a craft store. Choose those that you like, but in a floral theme of blue, lavender or burgundy colors. If you have chosen furniture handles with ceramic inserts, then this pattern should be in harmony with the image on the decoupage napkins. We dealt with the old coating in the previous sections. In addition, you need to replace all the old hinges for the doors, repair skewed drawers, and also make other repairs, if necessary.
Let's get started step by step description DIY sideboard decoupage:
- quickly wipe the entire surface of the sideboard with a damp cloth so that no moisture is absorbed;
- cover all cracks with wood putty;
- go over the entire surface with sandpaper, removing all defects;
- cover the wood with stain and let it dry;
- now is the time for a unique aging technique - apply wax to all corners, drawing on them with a wax candle;
- coat the sideboard twice with white paint, however, all pale pastel shades are well suited for Provence, especially mint and lavender;
- After the paint has completely dried, remove the wax by carefully manipulating it with a metal brush. This is a simple and effective technique for simulating antiquity;
- We coat the napkins with PVA glue and glue them to the lower or upper doors, carefully smoothing them out to remove air bubbles;
- To make the glue work faster, direct a stream of hot air from a hair dryer at it;
- Cover the decoupage areas with clear varnish. Do the same with the aging areas.
The new Provence style sideboard is ready, the only thing I would like to add is that if there were glasses in the sideboard, they can either be painted over or replaced. And, of course, don’t forget to place a bouquet of lavender in a white ceramic vase on it.
From an old sideboard - an “antique” sideboard
Antique furniture is always in fashion - it adds an aristocratic touch to the entire interior. It’s nice that this technique can be done with your own hands, which means it’s cheap. There are several techniques for artificial aging, choose the one that suits you best.
Method 1 – craquelure varnish
Additionally, you should purchase craquelure varnish in specialized stores; all other materials were described above.
Description of works:
- After removing the old coating and sanding with sandpaper, apply a special craquelure varnish to the surface. It has the ability to transform the entire surface into a canvas cracked, as if from old age;
- After the previous composition has dried, you need to apply paint or clear varnish to the surface of the sideboard.
After all the procedures, you will receive an “antique” sideboard for a wonderful price short term. It should be noted that using paint in this method is more preferable - the effect will be brighter.
Method 2 – mechanical aging
For this method you need to prepare two stains for on different basis, shellac primer and restoration wax.
Description of works:
- After cleaning the old varnish or paint, apply water stain as a basis;
- lighten with a moistened sponge those places that are more visible;
- after drying, you need to sand the areas that will be darker;
- now apply the stain again with a different base;
- After the second layer of stain has dried, fill all places with shellac primer using a brush;
- using a wire brush, rub in the restoration wax, moving it along the fiber;
- After the wax has dried, wipe the sideboard with a soft cloth;
In fact, there are many more ways to age. Uniquely beautiful masterpieces are created using the “shashel” method, but this can be done by those who are familiar with carpentry.
Painting an old sideboard with gilding
Here's another way to refresh old furniture do it yourself - paint it in colors that were fashionable 60 years ago. Remember how at my grandmother’s everything from the doors to the furniture was painted white, blue and blue - the trendy colors of that time. To do this you need to use oil paints in ivory, pale blue, white and gold.
When purchasing gold paint, make sure it matches oil paints, otherwise everything will come off.
Description of works:
- remove old varnish and paint, eliminate defects and sand using the previously described methods;
- install new furniture fittings;
- paint the buffer frame ivory, paint the doors pale blue;
- cover the patterns, edgings and frames of the glass with white and gold paints to your liking;
- After drying, coat all surfaces with varnish.
In addition to regular painting, you can paint symmetrical patterns in ancient styles. For those who are especially sophisticated, we suggest making a buffet in the “Gzhel” style. Complete the interior with linen curtains, all kinds of ceramics and other antique elements.
Do-it-yourself restoration is a budget option that will allow you to become the owner of chic antique furniture. You can combine several of the described techniques or come up with your own version of how to update old furniture. Choose the option you like and try your hand.
Often, after renovation and change of furnishings, there are pieces of furniture left in the apartment that are a pity to throw away, and cannot be fit into the new interior of the living space. In this case, the solution may be to restore and update the design of old furniture products.
This procedure should be resorted to when you still have an old sideboard at your disposal, which, in its own way, functionality surpasses many modern furniture made in minimalist traditions. Even if experiments with restoration fail, you can always send it to the country, install it on a loggia, or give it to less wealthy friends.
Before starting restoration work, you should familiarize yourself with using existing methods updating furniture and stocking up on necessary materials etc.
It’s not for nothing that the kitchen buffet cabinet has remained so popular for so many years. There are certain positive aspects of using a utensil cupboard in the kitchen:
- a kitchen buffet is regarded as a modern twist in the interior, which will also serve as a decorative element;
- A buffet display cabinet for the kitchen is also good because behind the glass doors you can place the most beautiful dishes that match the style of the interior;
- it is very roomy, so a cupboard for dishes in the kitchen will help save such important free space;
- Unlike current furniture, a wooden sideboard is not harmful to health.
Many houses still have old-style sideboards. They can become an alternative to a modern buffet.
After all, why spend money on a product made from short-lived materials if you can return it? beautiful view the trusty old closet?
It will not be difficult to repaint it in the desired color or paste it to match the kitchen.
A wonderful alternative can be a display cabinet or even a whole kitchen island, made according to the principle of the bottom of a buffet.
Modern models are traditional versions of buffets, but the material used for their manufacture is most often of lower quality. And all because a kitchen buffet made of wood, which is of high quality, is not affordable for everyone.
A sideboard in a new kitchen interior, for example, may even look significantly different from its ancestor. The same composition of two modules is possible, but here extra bed There is not always a space on which to store decor and decorations.


